LR029a - Scanning Family Archive Film Based Images Part 1LR029a (V01) – Scanning the Family Film Archive (Part 1) ========== PART 1 ===========DOCUMENT CHANGE LOG V01 – LrC/15.0 - 2025-11-12 ========== PART 1 =========== WHAT TO SCAN AND WHAT TO TOSS (Culling) USE OF METADATA TO RETAIN OTHER INFORMATION ========== PART 2 ============= INTRODUCITON DOCUMENTS DEALING WITH DUPLICATES INVOLVING OTHERS IN YOUR PROJECT DO YOU STILL KEEP THE PRINTS/SLIDES/NEGATIVES SHARING THE RESULTS ARCHIVING THE RESULTS FOR FUTURE GENERATIONS Legal Considerations Physical Storage Media Online Archive COUPLE OF LAST MINUTE TIPS AND THE LIST GOES ON FINAL COMMENT
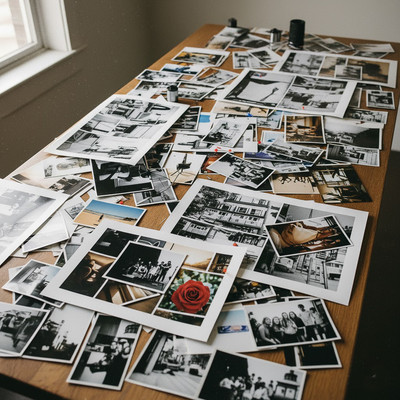
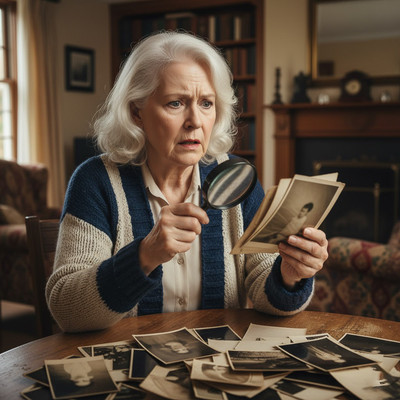
INTRODUCTIONFirst, apologies for the length of this article. It was supposed to be shorter but I just kept finding more and more topics that I’d be remiss in not including. Over the past several years a couple of factors have converged causing the number of people trying to digitize their family legacy of film based photos to explode. For one thing, boomers (that’s me) and our parents grew up in an age where the world of photography had become affordable to everyday people and photographing took off like a rocket. And we are now finding that we have piles of negatives, slides, and prints that we worry about. Or, perhaps, our parents or grandparents are passing on and in cleaning out their house we have discovered, and inherited, large collections of film based photographic history that should be shared and preserved in some way. In the past, we’d just move the boxes of prints and negatives from one attic to another and be done with it. But now we want be able to share this photographic legacy with other family members and put it in a form that is less likely to be abandoned, lost or destroyed over time. The second factor that is causing an upsurge in scanning was COVID-19. Many of us found ourselves marooned at home for a year or more waiting for the pandemic to blow over and faced a choice of becoming larger than our refrigerator or finding something else to occupy our time. It is amazing how many took on the task of digitizing the family’s archive of film based photos – be they prints, negatives or slides.
For those of you who are already in your 37th month of such a 30 day project, you are probably amazed at several things such as how long it takes, not to mention the dozens of decisions and complexities encountered along the way. Many of these issues we never would have thought of before we smacked into them. For example:
And, the list goes on. Some of these questions may seem pretty simple. But when you actually get into it, many times it’s a more complicated question than it seems. So, for the benefit of those just embarking on this sort of project I’ll go over what I’ve learned over the past several years of scanning my own family archives. Take it for what it is worth and keep in mind that the possibilities and variations are endless. WHAT TO SCAN AND WHAT TO TOSS (Culling)
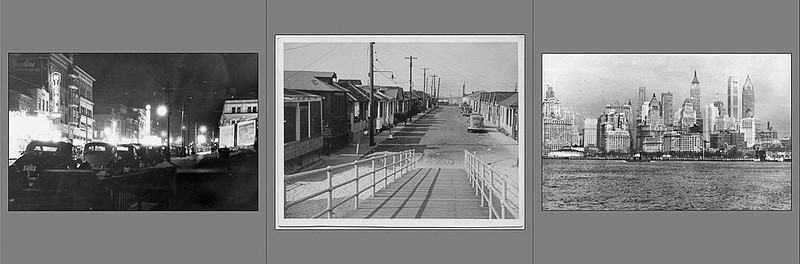
This is a tough question, especially if your ancestors were prolific shooters. In my case my father in law was an avid photographer and also traveled a lot. This was to the tune of well over 20,000 images when he died in 2021. So, what do you just toss and what do you keep and scan? To be honest I don’t think that any of his work would rise to the level of valuable art or that he’ll be ‘discovered’ as a new Ansel Adams or Dorthea Lang. But some of it may have historical value. For example he had lots of photos of Brooklyn, Coney Island, and Rockaway in the 1930’s and 1940’s. These could be of historic interest to civic archivists not to mention nostalgic interest to family members who recall those locations. He also had tons of “travel” images from his many trips world wide.
Of course you will keep images containing family members (not all 6 of aunt Beth taken one right after the other, but the best of the bunch), and those will be the core of the family archive but how much of this other stuff do you keep? Do I really need a slightly out of focus photo of Tower Bridge in London, or a ‘fall color’ landscape taken in some unidentified place in some unknown year? Probably not. Will I ever send historical images of places in the early 20th century to museums or historical societies in the off chance that they may want them? Probably not, but if I do I’d probably send the original and not a scanned version anyway. But what about photos of the house where great grand dad lived in the 1920’s, or his first automobile in 1935, or the cabin in the Catskills mom went to with her mom and dad each summer while she was growing up? No one still living made those trips so even though it was an important part of mom’s childhood, is it worth keeping? And, what about ex romantic interests of long gone family members? Do you keep the photo of your dad’s first girlfriend in High School?
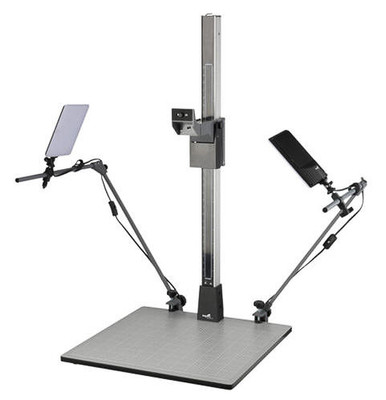
These are important questions that I can’t answer for you. It all depends on the nature of your family – especially those who will be recipients of these images. The only guidance I can give you is this. As you browse through images from your family’s past, which ones do you stop and look at longer than others? If you are like me, I just skip right over the “travel” photos of Paris or London but linger more on photos with people in them. Formal portraits hold interest if they are prior to WWI (we found some studio portraits taken in Russia in the 1800’s – presumably of family members – but we don’t know who they are or where they were taken). If you are lucky enough to have information for images like when, who, and where, those are certainly worth saving. If you have prints, they are easier to cull before scanning as you can make piles and can easily see if they are in focus and who’s in the shot. However, with negatives it is quite difficult to “see” what the image is and who is in it. In these cases it is much easier to do the culling after the images have been scanned. But, if you’re paying a scanning company or need the project to go faster this may not be an option. For slides you may want to buy a photo loupe. This is like a jeweler’s loupe but designed for the size of a 35mm slide. Or you could invest in an inexpensive slide viewer. With such a device you can see the image big enough to determine who’s in it and if it’s in focus. But, in general, my suggestion is to scan all the images that have recognizable people in them unless you are sure they are irrelevant people. I’d also scan one or two “location” images that have meaning such as the house relatives lived in or the church where they were married. I’d also keep one image representing each travel destination they went to even if it has no people in it. These photos can be used as an “establishment” shot identifying where they went so the following ‘people images’ have a context (e.g. “Fred & Mary’s 1942 honeymoon in London”). I’d toss the rest. SCANNING DEVICEThere are several options here, all with trade off’s. There are commercial services that will do the scan for you (at a cost), you can use your own camera, or you can use a scanner. Commercial services are all over the map, but they are all quite pricey when you multiply by the number of images being considered. Also, many of these companies scan at a pretty low quality or charge much more for higher quality scans. So, do the math before you set off on this path. If you decide to use a commercial scanning outfit it is best to cull your images before you pay to have them scanned. However, with slides, negatives, and prints it is sometimes quite difficult to organize them in such way that you can see which are near duplicates of each other and which are unique. It’s also sometimes hard to separate the wheat from the chaff. For example, is that WWII soldier someone from our family who you just don’t happen to know by sight or is he an unnamed barracks buddy of grandpa when he was in the service? In other words should I pay to have it scanned in the hope that someone in the family will recognize that person as a family member versus potentially tossing the only photo we may have of that cousin? If you decide to do it yourself, you will save a lot of money but it will be a much longer project. Don’t try to do it in one fell swoop. Rather, just keep the project plodding along in the background. Work on it for a few hours every couple of days. My process was to intermingle the scanning with my regular work. I tend to spend much of my time in front of my computer anyway, so it was no big deal to stop what I was normally doing and put the next set of negatives into the scanner and hit “start” and then go back to what I had been doing (like writing blogs like this). Then, when I hit a break point, load the next batch. But, whatever you do, be sure to clean the dust off the media before scanning it. Here are some of the device options. Copy Stand / Light TableMany people buy or build a copy stand and/or light table and use their regular camera to re-photograph the prints, slides or negatives. For prints you would use a copy stand with a mount for the camera pointed straight down onto a flat surface where you place the prints. Then on either side are lights aimed at the print. You can make your own or buy one like the one shown below. If your prints are bent or curled you may want a piece of non-reflective glass to lay on top of the print to flatten it out while taking its picture.
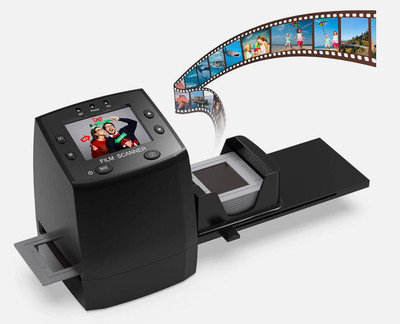
For negatives and slides there are all sorts of products on the market that are designed to let you use your own camera to take photos of slides or negatives. Or, you can make one where you place the image on top of a light source and then use your camera with a macro lens to take a photo of the slide or negative. Film ScannerThere are many brands of dedicated “Film Scanner” devices from around $100 up. These are typically self contained devices designed to process either a slide or a strip of negatives – some have automatic feeders where you can place a whole stack of slides or a long strip of negatives and it automatically scans the whole bunch one at a time. Most are one slide or negative frame at a time so are more time consuming to use than, say, a flat bed scanner. Some work better than others so look at reviews.
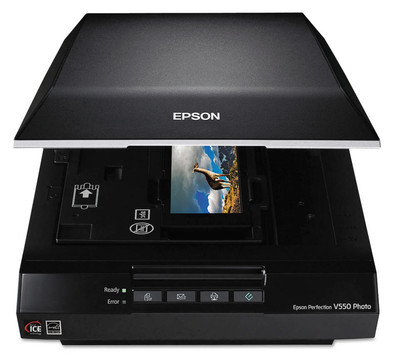
Flat Bed ScannerThis, in my opinion, is the best option as one device can be used for prints, slides, and negatives. Some advantages are that the digital file goes directly to a folder on your computer, the scanner can handle several slides, prints, or strips of negatives at a time and automatically separates the individual shots into a separate output files, and most will also invert a negative so the resulting image is correct. Flatbed scanners also give you a wide range of options for resolution, output file type, and many have features for digitally removing dust and minor scratch in the scanned image (Digital ICE).
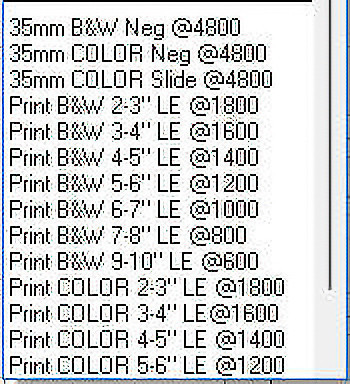
Some of these even have automatic feeders. You can spend under $200 for a pretty good flatbed scanner or several thousand or more for a commercial/professional model. FILE TYPEFor archival purposes, one wants to output an industry standard file type that is expected to last quite a long time before being replaced by newer technologies. At this time, that is JPG (for snapshots) and TIFF or DNG (for higher quality). This does not guarantee that these won’t be superseded at some point but so far they have stood the test of time even though “better” replacements have come and gone. Right now PNG, HEIC, and JPG XL are taking a crack at it but not too long ago JPG 2000 was touted as being the replacement for JPG and it is nowhere to be found now. My suggestion is to avoid any new ‘latest and greatest’ formats that come along until such time as they have gained a commanding market share of cameras producing them, editing programs supporting them, operating systems natively handing them, and websites/social media accepting them. RESOLUTIONIf you use a digital camera to photograph the images, the camera's resolution will be what you get but you do have some in camera control of this. However if you use a dedicated scanner, as I suggest, you have many more choices. Some considerations for resolution are (as usual) disk space vs. quality but now we also have to add time needed to do the scan. If you have Ansel Adams quality images then go big. However if you have poorly composed amateur snapshots (plenty of camera shake, marginal focusing, etc.) and which have not been stored well (dusty, scratched, faded), then having a high resolution capture of an out of focus grainy image gives you great detail of that blur and grain. After all these are for historical and nostalgia purposes and will never be printed large or find their way into a competition or gallery so the utmost quality is not really needed. I find it easier to think about scan resolution in terms of the number of megapixels in my cameras. Do I want my scans to be equivalent to a photo from my 20mpx camera or from my 50mpx camera? I suggest making two piles of images. One is the pile of "snapshots" and the other is a pile of "quality" images (if any). For the snapshots, 3,000 x 4,000 pixels (12mpx camera equivalent) should be enough but you may want to go with 4,000 x 6,000 (24mpx camera equivalent) and JPG is fine for this purpose. For the quality images the equivalent of a 50mpx camera should be sufficient (~8700 x 5700 pixels) and for these I'd go with TIFF or DNG. But getting those values may not be all that easy. Scanners like to let you pick the DPI rather than specify the pixel dimensions you want. So, you have to do some math. Let's say you're scanning a 3" x 5" print and you want it to be 4,000 x 6,000 pixels (equivalent of a 24mpx camera). I find it easier to just deal with the long edge value. In this case you want 5" to become 6,000 pixels so set a DPI or PPI of 1200 (6,000 divided by 5). In my scanner (Epson V550) software I made a preset for 35mm color and one for 35mm negative and then a set of presets with one for each long edge print size by inch (1-2, 2-3, 3-4, etc.) with a separate set of presets for B&W prints and a set for Color Prints. I then taped a piece of paper marked with inches to the table near the scanner so I could quickly measure prints. So, if I grabbed an 4 x 6 color print, I would pick the "Print COLOR 5-6” LE @1200" preset. The “@1200” part of the name is the DPI used by that preset.
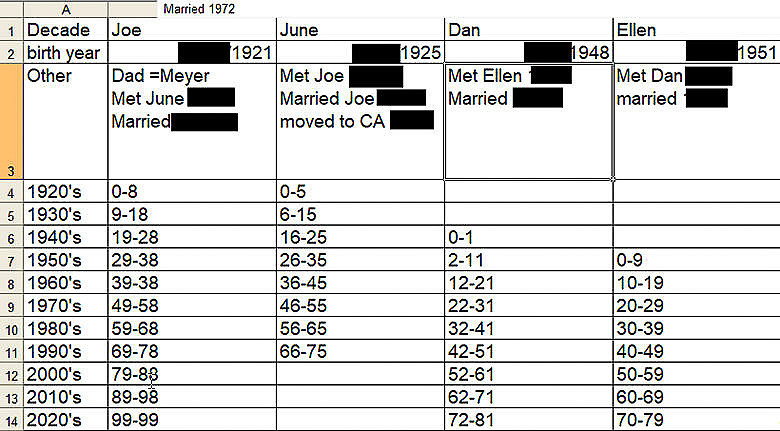
Using this method, I took all the prints (a large plastic bin’s worth) and sorted them by the long edge size making one pile for each inch range also separating color from B&W. For smaller prints I could fit 4 or 5 at a time on the scanner. For larger prints I had to scan them one at a time. The last thing is that the higher the resolution the larger will be your files and the longer the scan will take. Don’t just scan everything at very high resolutions as you want ‘the best’. This is silly as it will take forever and we’re talking about low quality images to begin with. Use a resolution appropriate to the size of the thing you are scanning and its quality (technical quality, artistic quality, historic value). DATESBy default, when you scan a print, negative, or slide the capture date is set to the date/time when you did the scan. I presume that some scanners might let you type in the date/time you want to use as the capture date/time but mine did not. So, I got the scanned date/time as the capture date/time. But I do not like that as many times I have my LrC grid sorted by capture time and the order I happened to scan things usually had no relationship to when the original image was taken. So, part of my scanning workflow is to modify the capture date/time. If your inherited trove of images is anything like what I wound up with, documentation was an unheard of enterprise. Sometimes prints would have some cryptic and many times illegible text on the back that only on rare occasions mentioned who was in the image, where it was taken or when. Sometimes I lucked out and there was relevant information like “Unk and Claire, New Mexico, 1942”, but mostly I’d find things like “Summer Vacation”, “Cousins”, or just “Ireland”. Not all that useful. But, dates are somewhat important to archival collections. So, one must become a bit of a sleuth and be happy if you can narrow it down to a probable decade. For all the relevant people in your family, make a chart where you have a column for each person. Include date of birth, date of marriage, date of death and if you know it other major milestone dates like a move across country, dates in the military, etc. Then make a row for each decade. In the cells where the person intersects with the decade put their age range during that decade. Something like this:
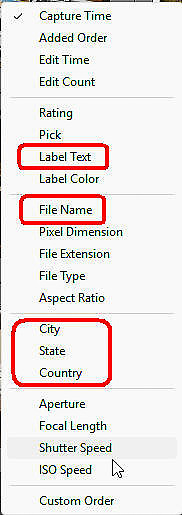
By guessing the age of the person in the photo, you can use the chart to guess the decade of the image. This works especially well for images of kids where their age is much easier to guess. If you can figure out who the kid in the image is, and can take a reasonable guess at their age in the photo the chart can give you a pretty good guess at when the photo was taken. Likewise, if photos include your mom, and were taken by your dad, then you know it was taken after your mom met your dad. If the photo has a recognizable house in it and you know when folks moved from one house to another that’s another way to deduce the date. You can also narrow it down quite a bit by looking at the cars or clothing styles in the image. If you’re scanning strips or rolls of negatives, or boxes of slides, you can be pretty sure that all the photos in that strip or roll were taken in the same time frame. So, if you can date one of them, that will supply a close enough date for all the others in that set. If you have negatives, there is sometimes info in the margin of the film that can be used to determine which strips came from the same roll. But, even with all that detective work sometimes you still have no idea of the date, or even the decade and that’s as good as it is going to get. So, what do we do with these accurate, approximate, or unknown dates? In the next section we’ll put images into decade folders, but first I like to fix the capture date to be closer to the actual date taken rather than the date scanned. If you do this make sure that the corrected date winds up in the image file itself for future generations. Fuzzy DatesFuzzy dates impose quite a problem as dates in LrC and computers in general are stored as a number. The date/time that a value of zero represents is called the “Epoch” date and varies by operating system and in some cases by application. Positive numbers are later than the Epoch date and negative numbers represent dates going backwards form the Epoch date. Due to this, the concept of "sometime in 1985" or “circa 1940” do not exist. The way folks deal with this problem where the exact date is not known is either to put such info in the title or caption (or other field) and ignore the date fields altogether. But that doesn't allow for sorting by capture date. Others use a sort of "code" for values in the capture date field – and that is what I do. It is extremely rare for you to know an actual time of day when a scanned image was taken unless there is a clock in the photo. So the time portion of a date/time field can be used for codes which explain how much of the date portion of the field is known and what part is unknown. I use the hour portion but you could use the minutes part of the time instead or for that matter some un-related field. But I like having the deciphering code alongside the thing using the code and have chosen the hour part of the time for this purpose. For the date portion of the capture time I use “01” for parts I don’t know. Here are the codes I put into the ‘hour’ portion of the time. (Examples below are using the MM/DD/YYYY format for dates). 00 = No Clue. 01 = I just know century 02 = I just know decade 03 = I just know year 04 = I just know the year and month 05 = I know the exact day This leaves the minutes and seconds available for incremental values if a string of images should be in a specific order or came from the same film roll. Some folks use some other metadata field for the code which denotes what part of the date is known or unknown and then always use a time of 00:00:00 to mean "this is a fuzzy date" which indicates that you should look at that other metadata field to figure out what part of the date is know or not known. And, a 3rd option is to put a full date with place holders into some text type metadata field (e.g. "1985-xx-xx" to mean sometime in 1985, or "198x-xx-xx" to mean sometime in the 1980's. In this case the actual date field could always be some arbitrary date like 12/31/1899 at 00:00:00 which would be a signal to look at the designated text field in the metadata. Of course this option doesn’t allow sorting images by capture date unless you pick a field that does allow sorting and there are very few of those (circled below)
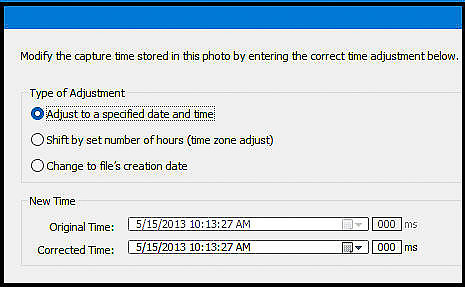
I use Label Text, City, State, and Country for their normal purpose so I don’t want to co-opt those fields for this purpose which leaves only File Name if you want to be able to sort by fuzzy dates. Other than the actual date/time field, file name can be a decent choice if you put a sequence number at the end (e.g., “196x-xx-xx 005” for “sometime in the 1960’s”) and then if you sorted these by file name the resulting order would be chronological depending on where “X” sorts in relation to numbers. Setting the capture date/timeBut if you choose to use the actual capture date field within LrC, one can change it using menu “Metadata -> Edit capture time”.
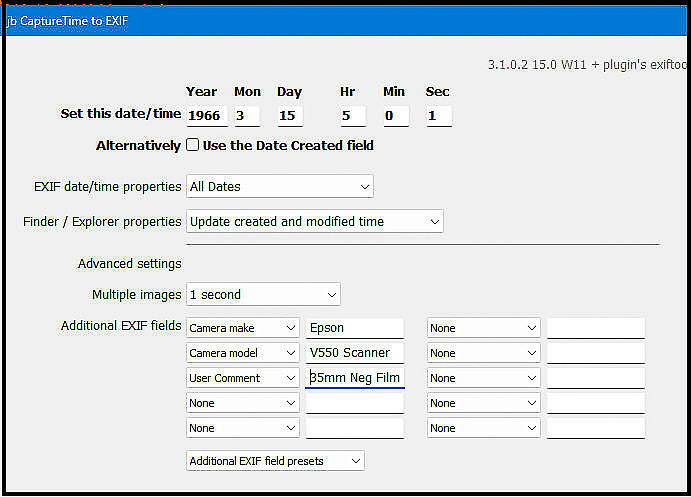
But the first radio button does not do what the text next to it says it does. In our case we want to select a bunch of images and change their capture date/time to the same thing (perhaps with incrementing minutes or seconds) and you can’t do that with this tool. Even though the first radio button (“Adjust to a specified date and time”) implies that it does what we want, IT DOES NOT. What it does is to calculate the difference between the date/time of the active image as shown in the “Original Time:” box with what you type into the “Corrected Time:” box and then it applies that difference to each selected image. This is not what we want. So, you either have to do it one image at a time with the LrC tool or use a 3rd party tool to do it the way we want. There are several that can do what we want but the one I use is “Capture Time to Exif” (http://lightroomsolutions.com/plug-ins/capture-time-to-exif/ ) which is quite good. (screen shot is a portion of the actual dialog box – there are more options as well)
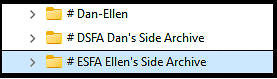
With this tool you can have all the selected images get the exact same date/time or have it increment that date/time by a certain value which you pick with a pull down menu. You can also have the plugin supply other metadata which you cannot manually put in using just LrC. In this case I had it put in the scanner info like it was a camera. Here I’m setting all the selected images to March 15th, 1966 at 5:00 am (the code for “I know the exact day) and incrementing the rest of the time by 1 second per image. FOLDERSFolder naming is a greatly discussed topic even with regular images from digital cameras with many differing opinions. And those same points and opinions apply to scanned images but with some added wrinkles. For one thing, most good folder structures are based in some way on image date but for many scanned images we only have an approximate date as discussed in the prior section. We also have the issue of where these images came from? For example, did these images come from my parents or from my wife’s parents – and does that matter? Well, in one sense it does as my relatives (siblings, cousins, aunts, uncles, etc.) are probably not interested in photos from my wife’s parents and vice-versa. But having said that, to our kids, photos from my parents are just as valued as those from my wife’s parents as they are all the grandparents of our kids. The same thing can be said for images I took before meeting my wife. These are of interest to my side of the family but not hers and vice versa. Yet, images taken since we met (married) are interesting to both sides as well as our descendants. So, where does this leave us? Each family situation is unique so all I can offer is to think it through but assure that whatever you come up with is un-ambiguous as to what folder structure any particular image should go in. What I wound up with is one parent folder for each ‘family group’
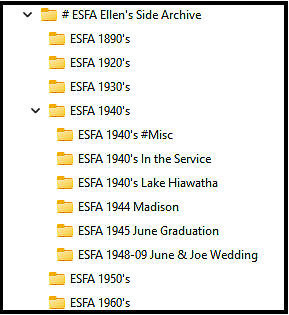
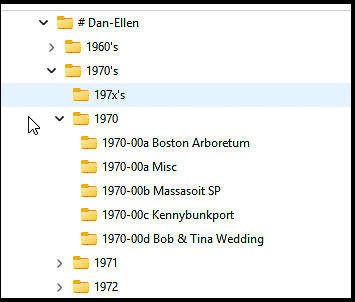
My normal folder structure is "Decade -> Year -> Shoot" (e.g. 2020's -> 2025 -> 2025-04a Grand Canyon"). So, as much as possible I wanted to keep that pattern within each of the 3 family group archives. But unlike images from a digital camera where you know the date/time down to the second, with scanned images you’re lucky if you know even the year let alone the month or day, and many times getting the decade is a stretch as discussed above. So for folders we're just trying to not have 20,000 images in one folder and yet have some sort of grouping by date. Under each of the family group parent folders, I have a folder per decade and where a decade has major milestone periods like a major trip or event I further subdivide into subfolders. Here’s a piece of that where I found loads of images from the 1940’s related to many ancestors in uniform, or stationed abroad. There were also some other significant events that I broke out into separate subfolders.
(“ESFA” = Ellen’s Side Family Archive) The “Dan-Ellen” family archive structure (since we met in 1969), is really what I already had in LrC before I started the scanning project. So, other than putting it under a new parent “# Dan-Ellen” and moving the few pre 1969 images to one of the other two family groups, I left the structure as was which for me was a folder per decade -> year -> event/shoot/trip
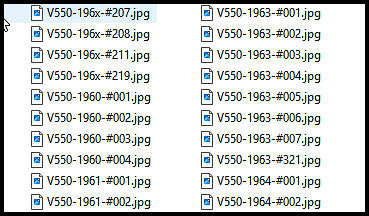
IMAGE FILE NAMESWhen using an LrC catalog, image file names are not all that important. However future viewers of an archive of historical family images will probably not have LrC at their disposal and even if they did, they would probably not know how to use it. So, assuring that important metadata is readily available outside of LrC is somewhat important. What people use for file names is all over the map but you should pick a naming convention and stick with it. I would suggest NOT trying to embed subject, film info, location info, etc. into the image file names as then names become to long and inconvenient. In my case, the first part of the file name is the scanner model number (e.g. V550 for an Epson V550 flat bed scanner). This is followed by the year portion of the actual or deduced date filling in with “x”s for the unknown parts of the year and then a sequential number.
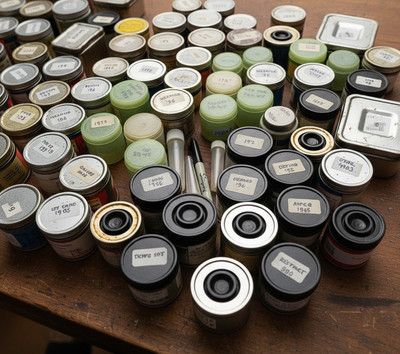
USE OF METADATA TO RETAIN OTHER INFORMATIONAs we go through our scanning project pieces of important information show up from various sources. Maybe it’s something written on the outside of a can of film. Maybe margin notes in a photo album of prints or something scribbled on the back of a print. Perhaps something is written on the outside of the shoebox containing the prints or negatives. And, maybe it’s just something you or some relative remembers about that image, people or place.
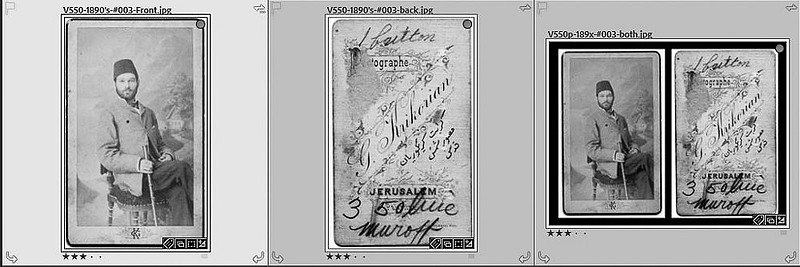
The only thing that seems to be universal is that you won’t find much and what you do find may be quite cryptic. Finding such information is great but what’s even better is if this information is actually correct. I only say this as in my scanning project I scanned a roll of negatives that were in an old metal film can with a date written on the outside of the can. The images were of my mom and dad on a camping trip someplace. However, the date on the can was 10 years before my mom and dad first met. Obviously at some point the wrong roll of negatives was put in that can or the can was re-used and someone forgot to update the label. So, what do you do to keep from loosing such information? Scan the Written TextIn cases where there is some significant text associated with one or more images, say a cover page in a photo album, or some extensive text written on the back of a print, also scan that text as a 2nd image. The problem we have though is how to assure that this second ‘text’ image stays associated with the actual image it is describing? One method is to put them in the same folder and use the same file name but add suffix’s to the file name like “-text” or “-back”. When I do this, I also like to make a diptych of both images in one JPG (usually this is just a screen shot of the two from LrC).
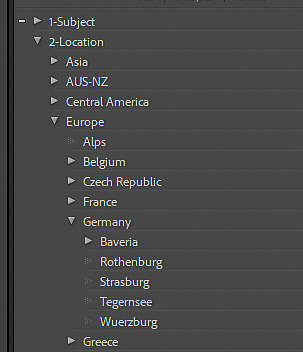
Keywords (and Collections)NOTE: I strongly encourage the use of Keywords over Collections in this case. The reason is that Collections do not accompany images outside of LrC but Keywords do. So, if you have a bunch of images in a collection called “Mary Jones” and 50 years from now your heirs (who no longer have your LrC catalog) are going through the images the fact that those images were once in the “Mary Jones” collection is gone. However, if those images have keyword “Mary Jones” and you saved the metadata to disk or exported with keywords, they will have that info in the “tags” on that image. Some information should find its way into your Keywords. Some examples are location information, the names of people, events like weddings and birthdays, other pertinent subject words (e.g., Grand Canyon, Paris France, Company picnic 1980, Brown Bear, Etc.).
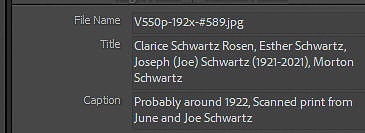
See https://www.danhartfordphoto.com/blog/2021/12/lr013-keywords-for-people for special considerations concerning keywords for people. Titles and CaptionsTitles and captions are useful in two phases of your scanning project. As you go you can use them for notes, questions, thoughts, and other information that is uncertain or needing input from other family members. Then at the end of the project they can be used to describe the images – many times repeating what is also in keywords or other metadata. The reason I use Title and Caption is that these two fields tend to be more persistent when images are put on web sites for review and comment and are the most likely fields to survive future technological migrations. During the scanning project, I use the “Caption” field for bulk info that applies to a set of images like things written on the film can or the title of the photo album or on the outside of the box or bin of prints. I use the “Title” field for questions and things that apply to a single image. For example if you ‘share’ collections of scanned images with your relatives using the “Make Public” feature of LrC, the viewers of those web pages can see what are essentially your notes in the Title and Caption fields and they can respond via the “Comments” tool. Here are some examples Title: Anyone know who this is? Title: Marvin Davis Title: This looks like Cathy Jones Title: Lorry Ford Title: Niagra Falls Title: Anne thinks this is aunt Judy Title: Is this the bungalow at Rocakaway Beach? Title: LrC face recognition thinks this is Larry, but it looks more like Ray to me, what do you think?” As you go along, much of this information will become clearer and as people, places and subjects are identified you can start putting more permanent text into the title and caption fields. Here are some examples: Title: Marvin Davis Title: Judy Mintz Title: Cathy Jones Title: Lorry Ford Title: Niagra Falls Sample in Metadata Panel
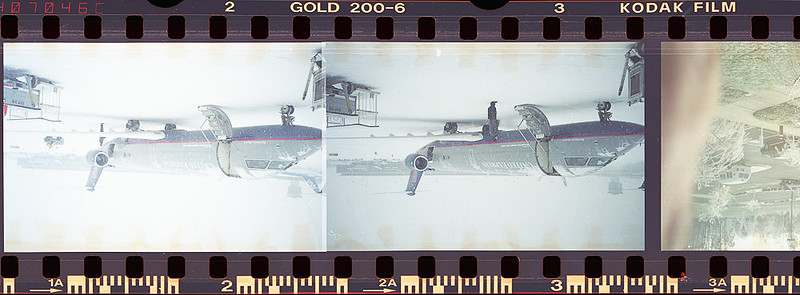
Film MetadataFilm metadata such as film type (e.g. Tri-X), shooting settings (SS, Aperture, ASA) are probably not available unless your ancestors were professional level photographers and kept log books of such things. But, sometimes the type of film can be seen on edge of negatives. If you think this is important to keep, it should probably be included in the caption field.
END OF PART 1See part 2 for rest of article HERE
Keywords:
danlrblog,
family archive,
Family archive scan project,
Film scanning,
fixing capture date,
image archive,
lightroom classic,
LR,
LrC,
Scan negatives,
Scan prints,
scan project,
Scan resolution,
scan slides,
Scanning negatives,
Scanning prints,
scanning slides
Comments
No comments posted.
Loading...
|