LR030 – Cleaning Up Folder MessLR030 (V01) – Cleaning Up Folder Mess Version History
ContentsOverall methodology considerations Proper use of import destination panel Same folder in multiple places Folders and files physically on disk are not showing up in LrC Can’t move images due to already existing in the destination folder Can’t import duplicate of a photo already in the catalog LrC shows some images as being on a backup drive
IntroductionIf you’ve found your way to this article, it is probably because you have found yourself with a tangled up folder structure or a lot of missing folders/images. Untangling this can be quite time consuming and tedious. But once completed the reward can be quite satisfying.
Some of the common issues that users face include:
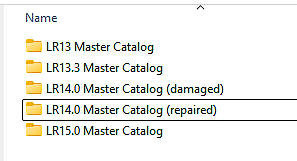
After years of helping clients untangle such messes (see: , https://www.danhartfordphoto.com/lightroom-help), I’ve discovered that no two clients have messed up their folder structure in the same way. Each case is unique in many regards however almost all include some form of duplicate folders, inconsistent naming, folders under wrong parents and missing items. In addition most also include extra images on disk that LrC doesn’t know about – sometimes in folders LrC does know about and sometimes in folders LrC does not know about. Going over every possible situation with detailed steps to fix each one is an entire book not an article (I know, I just tried). Instead, I’ll touch on the most common problems and provide an idea of what caused the problem, and how best to remedy the situation. Multiple active catalogsIn this case we are not talking about catalogs from a linear progression of catalogs created due to LrC version updates or making a replacement copy of a catalog (like in the list below).
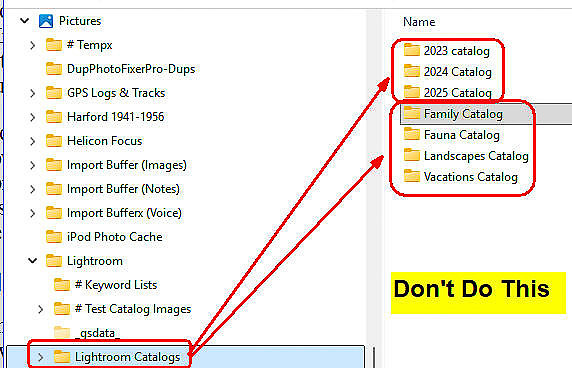
In these cases once the new catalog is created it becomes the active master catalog and the ones before it in line become obsolete and are no longer used for new images or edits to existing images. In other words the current active master catalog has all your images in their most current state and has entirely replaced the catalogs that came before it. The multiple catalogs we are talking about here are situations where for whatever reason you have multiple catalogs that you switch back and forth between where the same folders or images may be in more than one catalog with the same or different edits and/or metadata. Unless you have a good reason for multiple active catalogs this is a bad idea. But, there are some good reasons to have multiple active catalogs. For example a catalog for each photographer using the same computer, a wedding photographer may have a catalog for each wedding, or you may have a personal catalog and a work catalog. Having a catalog per year IS NOT A GOOD REASON FOR MULTIPLE CATALOGS. Neither is having catalogs based on subject matter.
I will cover how to merge multiple active catalogs into one grand master catalog in a separate article. However, pending that article, I should caution you that if the same folders or images are known to more than one LrC catalog if you move, rename, or delete any such folders or image files (or any of their parent folders) while cleaning up one catalog, those folders and images will become ‘missing’ in the other catalogs. Therefore if the same folders or images are in more than one catalog it is a good idea to get them all merged into one grand master catalog first. Then go about cleaning up the messed up folder and images Overall methodology considerationsDon’t kill yourselfIt is much better to work on your clean up for a few hours and then take a break and come back to it later that day or on another day. Trying to plow through the whole thing all at once is not a good plan. You’ll get frustrated, tired, and start to make mistakes. It is also OK to continue using LrC for your normal work between clean up sessions however if that is your plan, make sure you go through the “Stop making it worse” section below. If your folder organization is based on high level “year” folders, do one year at a time. I also recommend working through the years in order (either direction) rather than randomly picking years. I also recommend putting a color label on each year as you complete it as a marker of your progress.
Start new folder hierarchyDepending on how bad a mess you have, you may want to create a brand new Master Photos parent folder (maybe even on a new disk drive) and as you clean things up move the fixed folders to be under this new parent. While using this method you’ll have the old messed up folders that you haven’t repaired yet under one parent and as they are repaired they will be in this new hierarchy. Once done you’ll have all your image folders under this new master parent and the old folders should be gone or empty. Stacked imageDuring the clean up processes, it is important to assure that you are seeing all your images, even those in collapsed stacks. There are two ways to do this. One is to select all images in the “All Photographs” collection and “Expand all Stacks”. Another option is to create an empty regular collection (let’s call it “Empty Collection”) and each time you change to a different source folder, Ctrl + click (Win) or Cmd +click (Mac) on this empty collection to have it also selected along with whatever folder you are working on. This will cause all images to show in the grid regardless of stacking.
See Including images buried in stacks in the grid (2022) for more details on this. Color labelsI find that using color labels during clean up projects to mark files and folders that I may need to come back to or that have been processed is quite useful. If you choose to do this, start by making sure that the colors you use are not already being used for something else. Stop making it worseThe first step is to stop making your mess worse. Once you stop making it worse, you can continue your regular work in LrC in between your clean up sessions. There is one golden piece of advice I can give you that is quite important. SLOW DOWN AND PAY ATTENTION! For folder messes, there are two main causes:
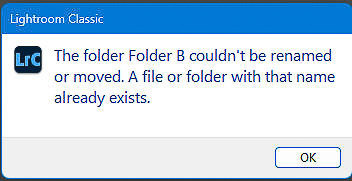
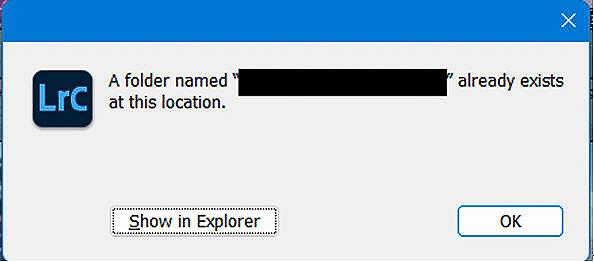
Proper folder managementIf you need to rename, move, or delete a folder containing images known to LrC (or any parent of such a folder), do so from the Folders Panel in LrC and not using File Explorer (Windows) or Finder (Mac). Rename Folder: Right click on the folder name in LrC and select “Rename”. Be careful as this option is right above “Remove” which starts with the same letters, has the same number of letters and with a quick glance can be easily mistaken for “Rename”. Move Folder: First, expose enough parent folders in the LrC folders panel to make visible the folder you want to be the parent folder for the one you are moving. If it doesn’t exist then the next higher parent. Do this by right clicking on a folder and then selecting “Show Parent Folder”. Repeat with successively higher level folders till the desired folder is shown. If the new parent already exists and is visible in LrC, just drag the folder to its new parent. If the new parent folder under which you want to move this folder does not exist, right click on the next higher parent and select “Create folder inside xxxxxxxxx” to create it. If this generates this error Delete/Remove Folder: In the LrC Folders Panel, right click on the folder name and select remove. If the folder contains images they will remain in the folder on disk so you may want to delete all the images in the folder first, then remove the folder. It’s a bit vague but in most cases if the folder is empty after removing it from LrC, it will be deleted from disk. However, if there is anything (including system files like “.ini” or “.db” files) in the folder it will not be deleted from disk. Proper image managementUse LrC not Finder/Explorer to manage images known to LrC. Rename Image file: If it’s just one image, select it and then in the Metadata Panel of the Library Module, type over the “File Name” field. If you need to do a bunch in a batch, select the ones you want to change and click the ‘F2’ button on your keyboard (or menu: Library -> Rename Photos). This will bring up the bulk file rename template tool. From here you can select a naming template or create a new one to use. Be careful as this cannot be undone with the “undo” command or speed key. Move images: In the Library Module grid, select the desired images and drag them to the desired folder in the Folders Panel. If it complains that the image is already there, see Handling Duplicate images. Delete/Remove Images: In the Library Module grid view (or film strip), select the desired images and then click the backspace (Mac or Windows) or delete key (Windows) on your keyboard. Then choose to either just remove them from Lightroom (leaving them on disk) or to remove them from LrC and delete them from disk. My advice is to try and have LrC know about all the images that are in folders known to LrC. Therefore either leave the image in LrC, delete it from disk or move it to a “garbage” folder you create. Proper use of import destination panelI’m not going to provide a full tutorial on the Import Dialog Destination Panel but the key is that if you are using any import mode other than “Add”, PAY ATTENTION to the destination panel.
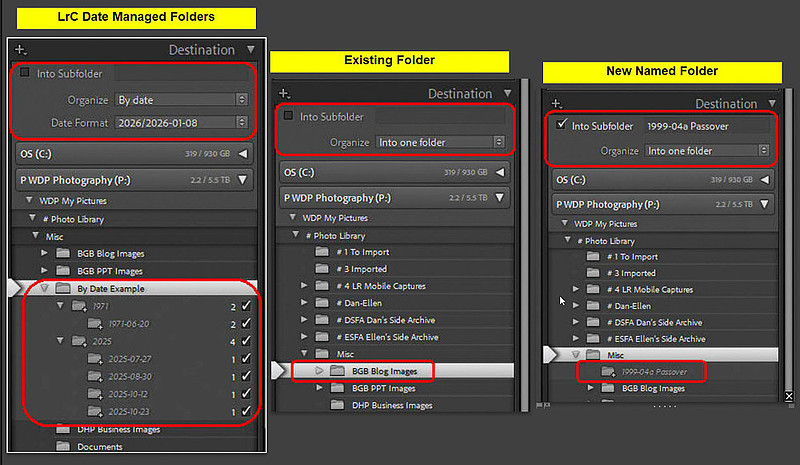
If you are using LrC managed date folders (“By Date” option), make sure the selected folder in the Destination panel is the one ABOVE the year folders. LrC will show you the folders that will be created (light gray font) for the images selected in this import. If you are not using LrC managed date folders (“Into One Folder” option), and the destination folder already exists make sure that it is the selected folder in the Destination Panel. If you are not using LrC managed date folders, and you want to create a new folder to receive the images from this import, check the “Into Subfolder” box, type the new folder name in the box on that same line and select the parent folder under which you want the new folder to go. The new folder that will be created will be shown in light gray. Have it all in LrCIf you find yourself with the sort of problems I listed, it is also quite likely that (excluding backups) there are also many folders and/or images on disk that LrC is not aware of. I find it best to get all folders with images into LrC so you can see them all in one place as you progress through your clean up process. There are two flavors of this situation. One is where LrC knows about a folder but not all the images within that folder and the second is where LrC doesn’t even know about the folder. Let’s tackle the first flavor first. I find it easiest to do this one folder at a time (or one year at a time if your folders are organized by year).
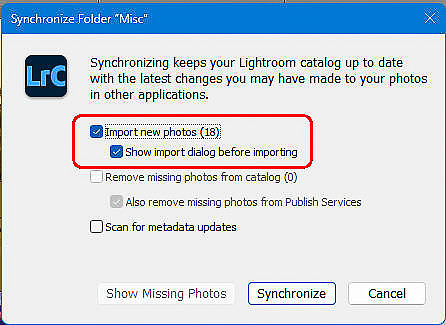
The above steps will account for previously unknown images in known folders but it does not account for folders which are completely unknown to LrC. To bring those unknown folders into the mix, you can manually compare the folders shown in LrC with those shown in Explorer/Finder and then import any folders on disk that are not in LrC. But here’s a more automated method to do that:
It may be the case that some of these new folders also contain images already in LrC and therefore were skipped in the import. If that is a possibility and you want to root those out, keep going with the steps below.
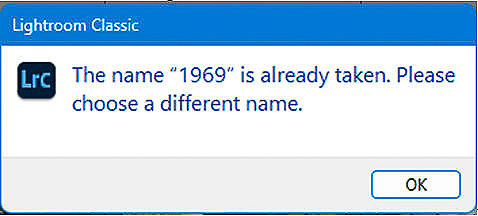
Misnamed folderIn your clean up effort you may want to rename a folder, perhaps to conform to a consistent naming convention. To just change the name of a folder, use the LrC Folders Panel and right click on the folder name then select “Rename” (be careful as “Rename “ is right above the similar looking “Remove” in the list and it’s easy to click the wrong one). Then type the new name in the pop up box. You may be surprised if you get an error saying that the typed folder name is already in use.
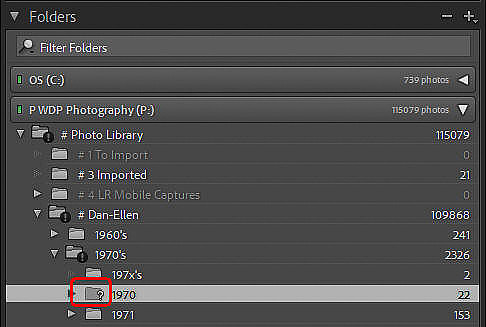
In this case you need to see if any of the same images are in both folders. If the folder you are trying to rename has subfolders that you want to retain, you may want to perform the rest of these steps on each of the subfolders individually. For images that are ONLY in the folder you wanted to rename, select them all in the grid and then drag them to the properly named folder. Drag from inside the image itself – not the gray area around the image – it will move all the selected images. For images that are in both folders, see Handling Duplicate images in this document. Images that are already ONLY in the properly named folder should just be left alone. Once all the images that need to be moved – including any in subfolders - are in the desired folder, any left in the folder you originally wanted to rename can be deleted. First, still using the LrC Folders Panel, select those images and delete them (delete from disk, not just remove). Next remove the folder from LrC by right clicking the folder name in the Folders Panel and selecting “Remove”. Finally, using Explorer/Finder, check to see if the folder was deleted. If it was not, take a look at what’s left inside the folder and deal with as desired then delete (move to trash) the folder on disk. Folder Marked as MissingThe Lightroom Queen has an excellent blog on how to deal with missing files and folders here https://www.lightroomqueen.com/lightroom-photos-missing-fix/ but I’ve included some additional information. You may have folders marked as missing. A missing folder is grayed out and has a “?” (Not an “!”) on the folder icon in the Folders Panel. Starting with LrC/15.0 when you have a missing folder, all of the parents of the missing folder are marked with an “!”
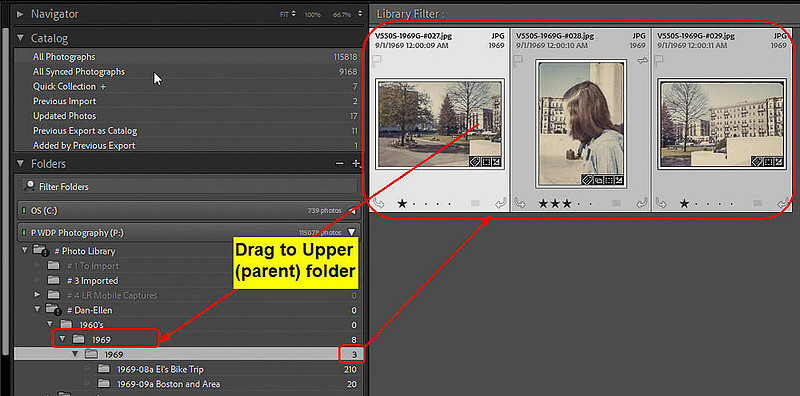
There are several causes of this such as not using the Folders Panel to do folder maintenance, moving to a new computer where the PC or Mac user name is not the same or a drive letter (Win) or volume name (Mac) has changed. This also occurs if the disk drive containing that folder is not currently connected to the computer. Another cause is deliberately choosing to use Explorer of Finder to do a mass change for performance or other reasons and neglecting to re-link the folders afterwards. The LrC catalog maintains a list of all the folders containing images known to LrC. This list includes the name of the folder and the path to that folder on disk. This list is what you see in the Folders Panel. If a folder in this list is no longer accessible using that path and folder name, then it is considered as “missing”. This is just another way of saying LrC cannot currently access that folder using the information it has about where on disk it is. Disconnected Drive: If the drive containing the folder is not plugged in, then plug it in. Mac Volume Name Changed: On a Mac, if the drive or Volume name changed, you can change the name back to what LrC expects using Finder or re-link any of the Missing folders which will fix them all (see "Re-Link Folder" below). Windows Drive Letter Changed: On Windows if the drive letter changed you can re-link any of the folders on that drive which will fix them all (see "Relink Folder below). To avoid this problem repeating over and over, it is suggested that for each external drive that has images known to LrC, you tell Windows to always use the same drive letter for that drive rather than just picking the next available letter in the alphabet each time you re-boot the computer. Pick a letter at least half way down the alphabet. Most people use “P” for “Photos” and then go on from there for additional photo drives. Do an Internet search for “Change Drive Letter” for instructions on how to do this. You will need to do this on each Windows computer on which you will use those drives. Re-Link Folder: See The Lightroom Queen blog https://www.lightroomqueen.com/lightroom-photos-missing-fix/ Missing FilesThe Lightroom Queen has an excellent blog on how to deal with missing files and folders so I’ll refer you to that article rather than repeat all that info here https://www.lightroomqueen.com/lightroom-photos-missing-fix/ Folder nested inside itselfThis is a common problem when not paying attention to (or understanding) the Destination Panel in the Import Dialog (see “Proper use of import destination panel”).
If you find that you have this situation, follow these steps.
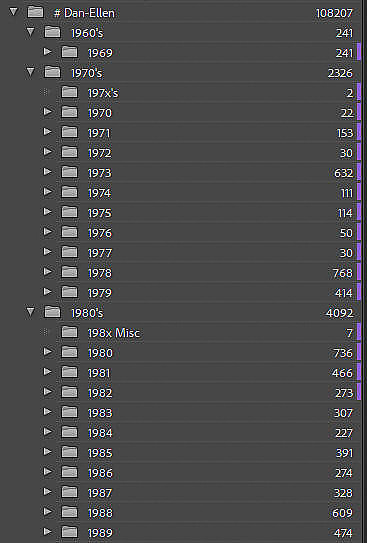
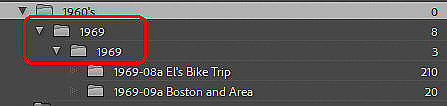
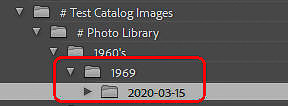
Folder under wrong parentFor example, folder “2020-03-15” is inside of folder “1969” rather than folder “2020”.
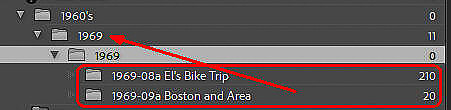
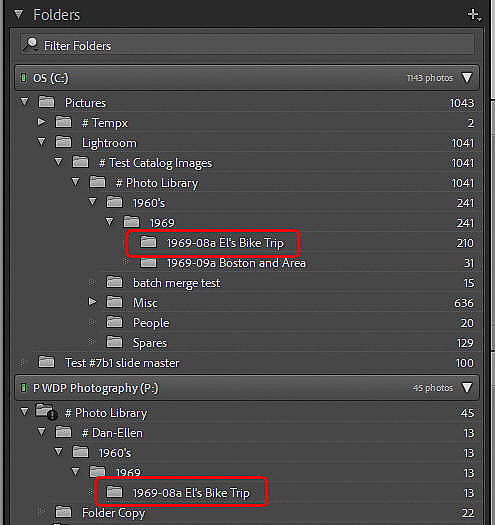
This often happens due to using previous values in the Destination Panel of the import dialog for a new import or selecting the wrong destination folder when using the “By Date” option in the import dialog. The fix is quite simple. In the folders panel drag the folder to its correct parent. However, this can generate an error if a folder with the same name already exists there which seems to quite often be the case with my clients. In this case see; Same folder in multiple places Same folder in multiple placesThis is usually caused by importing the same things multiple times to different locations which many times happen when the first import went to some unexpected place and you didn’t think it worked so you did it again to the correct place. But there are many other ways this can happen. Below is an example of this where folder “1969-08a El’s Bike Trip” showed up on two different drives (volumes) perhaps with the same images and perhaps with different images or some of each.
In this case the folder in both locations have the same name but this is not a requirement for this problem. As long as both folders are designed to house the same range of images then this section of the blog applies. To resolve this:
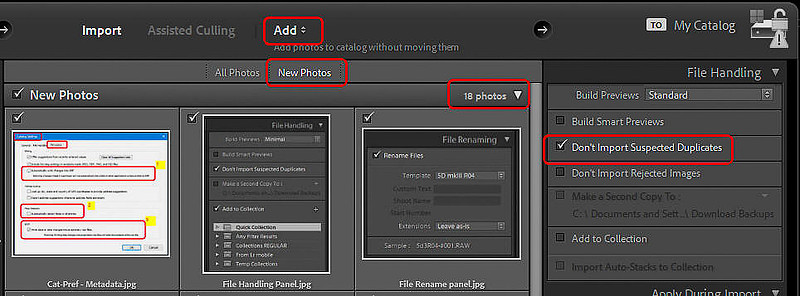
Finding Duplicate imagesThere are all sorts of ways you can wind up with duplicate images in your catalog. In most cases it is due to multiple imports of the same image – especially if you have “Don’t import suspected duplicates” in the import dialog unchecked. But this can also happen if you “import from another catalog or your Lightroom Sync process was moved to a different catalog. But however these redundant images got there dealing with them is pretty much on a one by one basis. Also see https://www.lightroomqueen.com/clean-duplicate-photos/ The first problem we run into when dealing with duplicates is just what we mean by “duplicate”. There are basically three realms of duplicates.
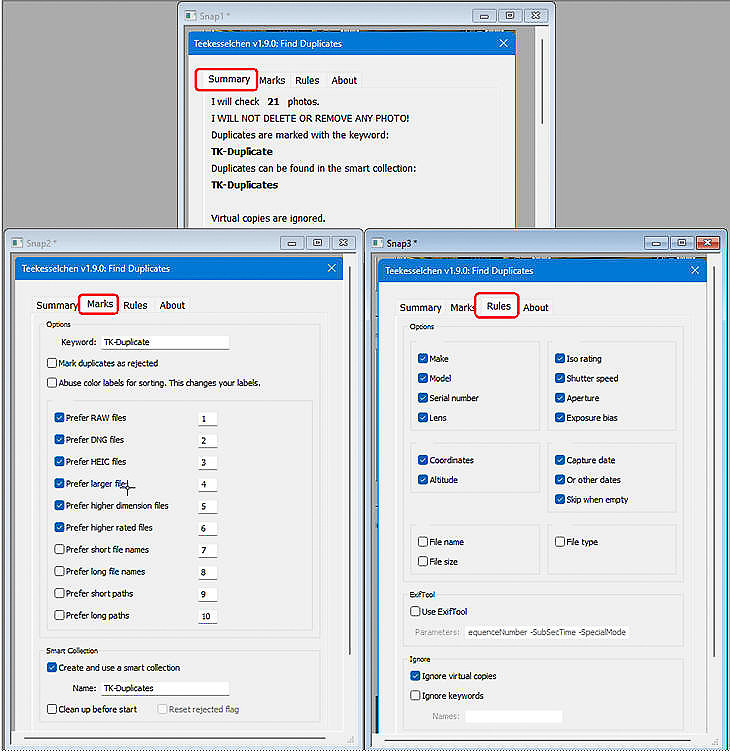
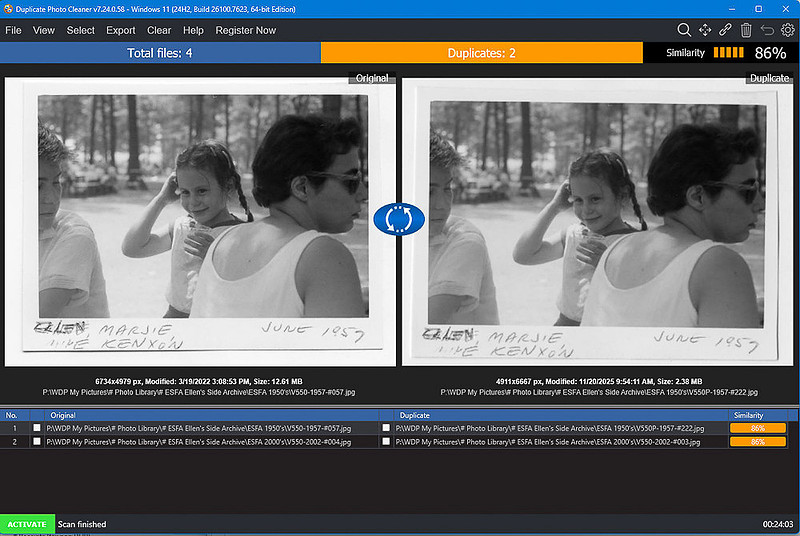
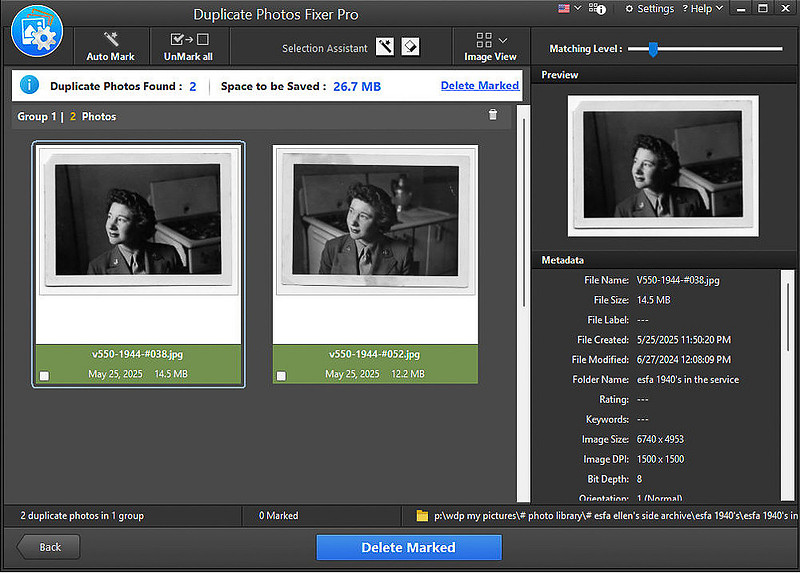
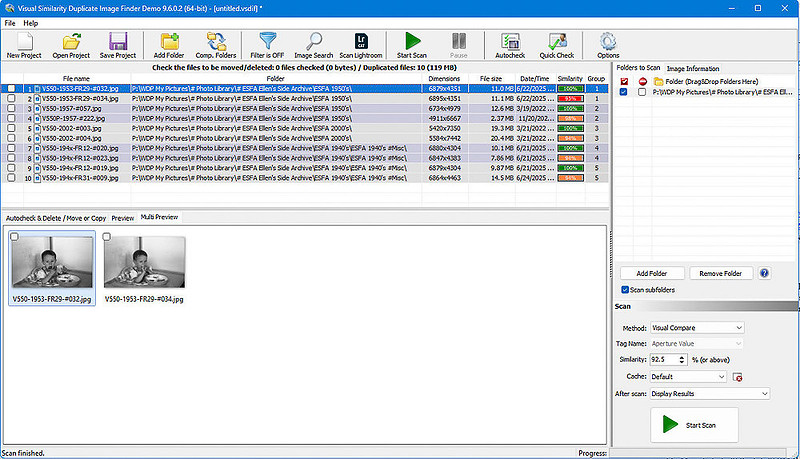
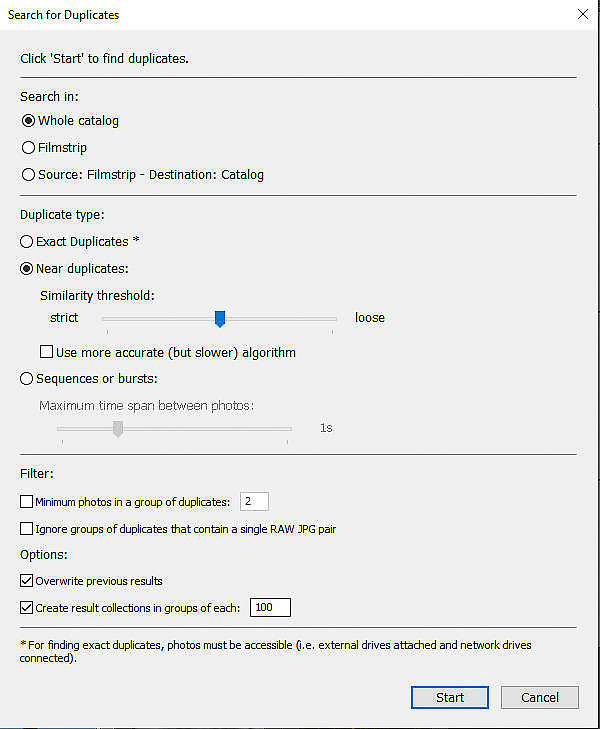
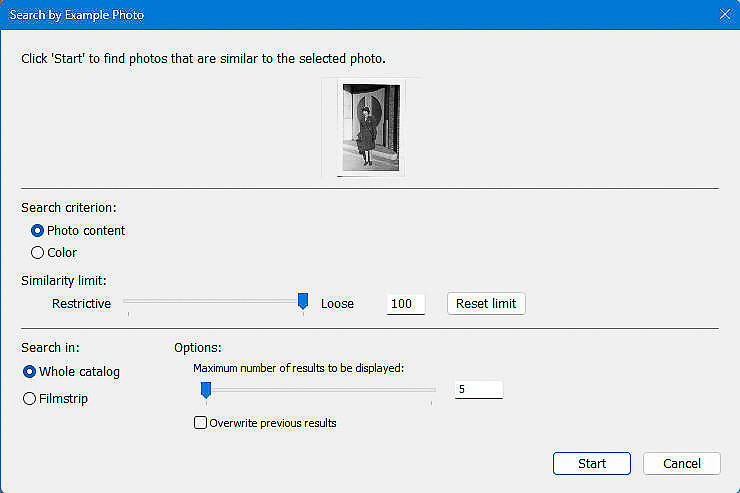
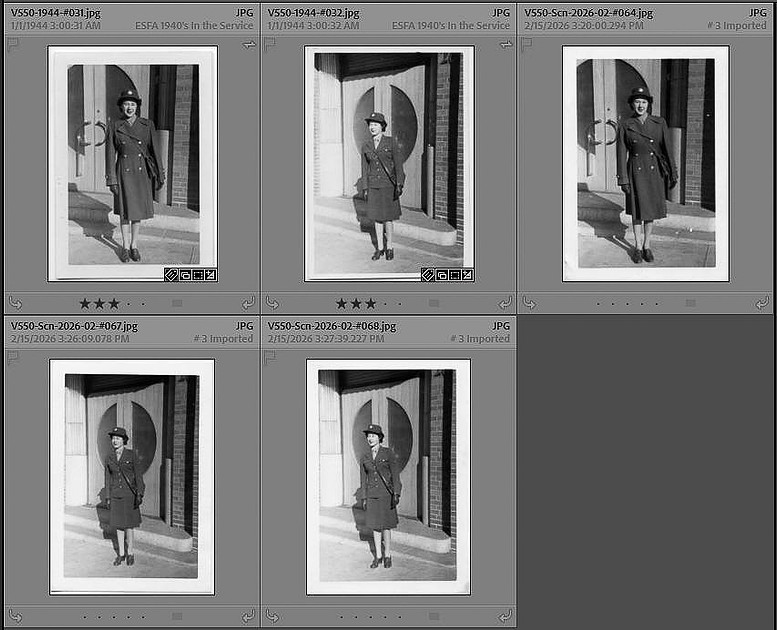
For case 1 and 2 (from same shutter click – not scanned in) We can assume that the EXIF (camera) metadata is the same amongst the “duplicates”. This includes things like capture date/time, camera make model and serial number; lens info, shutter speed, aperture, ISO, Etc. For these types of duplicates one can use a plugin such as Teekesselchen (open source donationware) or Duplicate Finder which detect duplicates based only on metadata and mark potential duplicates in any of several different ways. However, it is up to you to determine which version to keep and which to toss. Remember, some may be valid duplicates created for various purposes. Teekesselchen screen shots Once a set of duplicates are identified, using whatever criteria you desire pick the one you want to keep and see Handling Duplicate images. Then, if needed, move the keeper to its proper folder. For number 3 (visually similar images) There are also many 3rd party products that use varying degrees of intelligence to detect “visually similar” images. Most of these run outside of LrC so have additional considerations in getting the results reflected back in LrC. Some claim some sort of LrC interaction but read the fine print. However a few of them such as “Excire Search” run as a plugin inside of LrC. As with the standalone products some use ‘perceptual hashing” to detect visually similar photos which is an older technology and some use newer AI based “semantic analysis” methods. Duplicate Photo Cleaner Duplicat Photo Fixer Pro Visually Similar Duplicate Image Finder (VSDIF) Excire-Search has many modes for finding duplicates including starting with an example photo for which you want to find other visually similar images. In their nomenclature, “duplicates” is mostly based on metadata and while good for ‘true duplicates” and ‘derivative images’ and for burst mode shots, it doesn’t work well as well for other ‘visually similar” situations. Below is their control panel to find ‘duplicate’ images. And the control panel for “visually similar” (they call “search by example) images. The only way to get this technology is to select a reference image and then let it find others that are visually similar. Below is this control panel and an example result.
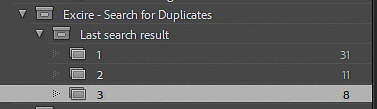
In my limited testing of several products using both technologies I was not overly impressed. I ran my tests using images scanned from prints, negatives and slides. In many cases there were two or more prints made from the same negative at different times in the past which I scanned at separate times. Each of 5 different programs found different ‘matches’. Some matches were completely different with absolutely no ascertainable similarity and some seemingly exact duplicates were not flagged as matches at all. So, don’t expect perfect results but many times it’s good enough to then finish the job manually using the suggested dup groups from the tool. I finally landed on Excire-Search using their one by one “Search by Example Photo” mode to help me weed out duplicate scans from the same negative and it’s working quite well, with a good results presentation (as collections) of the results. I’m still trying to get a better understanding of this product. But this article is not about reviewing these products, so I’ll leave it there. When using a program outside of LrC, you can typically have the program delete the selected dups from disk or have it mark the images in some way (keyword, star rating, flag, Etc.). Ones that run inside of LrC as a plug in can typically put suspected duplicates into a collection of each group of suspected duplicates.
If you have the external program delete the duplicate images from disk they will then become “missing” in LrC. This may be OK if you first assured the there were no other ‘missing images’ in LrC before you use the external program. Then after letting the external program delete images run the “Find all missing images” in LrC again and remove all it finds. On the other hand, if the external program sets metadata such as reject flag or adds a keyword to images targeted for deletion, first make sure that you are not using that feature for something else and before you run the program save metadata to disk so that all your other metadata is in or with the image files. Then run the program and afterwards return to LrC and read metadata from disk to bring that info back into LrC. Now see Handling Duplicate images, Once you’ve purged LrC of the unwanted duplicates, the remaining images should be moved to their proper folders if they are not already there. Handling Duplicate imagesWhatever methods or tools are used to find potential duplicates, there must be a method to determine what to keep and what to toss. Here are some considerations to use when deciding what to keep and what to get rid of.
The result for each group of duplicates should be an understanding of which you want to keep and which you want to toss. But don’t be too hasty in deleting the “tossers”. Keeper is ‘missing’ but a duplicate is not missing Use Explorer/Finder to move the physical image file from the folder where the duplicate you’ll be trashing is to the folder where LrC thinks the keeper should be. Once you do this the image will no longer be marked as missing in the desired folder. Be sure you move the correct image by verifying not only the file name but also look at the image in Finder/Explorer to assure it matches the one in LrC. Then remove the unwanted one form LrC. All are ‘missing’ See Missing files. You want to keep more than one as physical files If you have valid reasons to keep more than one and the belong in different folders, drag them to their proper folders. If, on the other hand, you want them in the same folder they must either have different file names on disk or all but one must be a VC (Virtural Copy). If they are physical files on disk (not VC’s), and you want to keep them as separate physical files but in the same folder they must have different file names. If they have the same file name, rename one or more of them using the LrC Folders Panel so the names are unique and then drag the ones from the incorrect folder to the correct folder. You want to keep duplicates as VC’s’ If you want to keep more than (for example, they have different edits) but would rather the various iterations be VC’s stemming from the same original image rather than separate images do this.
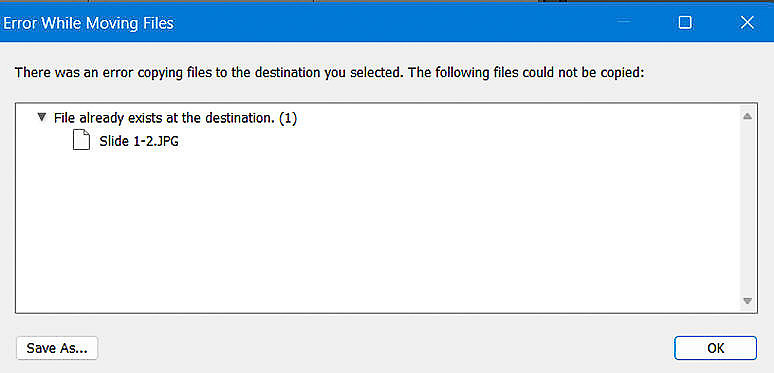
Folders and files physically on disk are not showing up in LrCSee Section: Have it all in LrC Can’t move images due to already existing in the destination folderThis is where you are trying to move images from one folder to another (using the Folders Panel) and LrC says that it can’t since they are already there. This means that an image with that file name is already in the destination folder on disk whether or not LrC shows it as being in the destination folder. When you attempt this you will get this error message
If the image it is complaining about in the destination folder is on disk but not known to LrC:
If a copy of the image you are trying to move is already shown in LrC as being in the destination folder you have the following options:
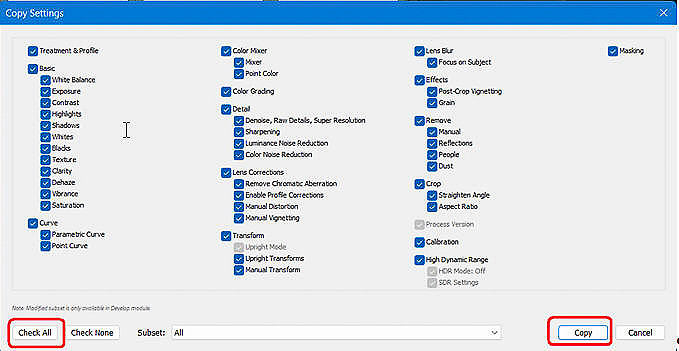
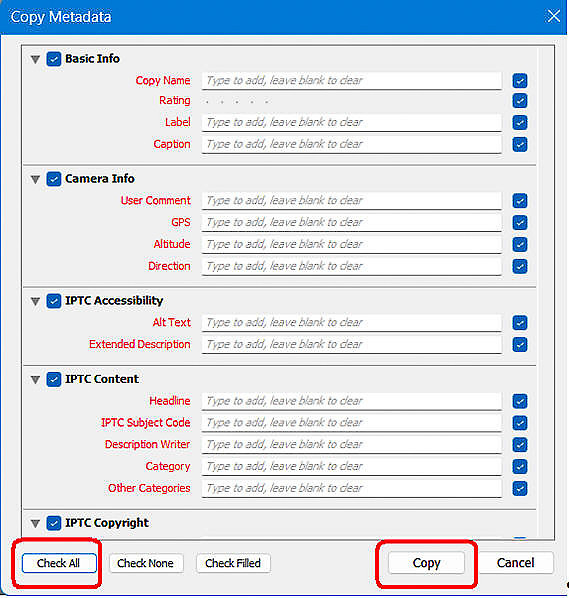
The following steps copy both the settings (edits) and metadata from the source image to the new VC in the destination folder. A faster method, if you’re familiar with it, is to use the Sync Metadata and Sync Settings buttons to do this copy. But this requires having both images selected at the same time which unless you know how to do it with the images being in different folders can be tricky. If you know how to do that, go for it, otherwise follow the individual steps below.
Can’t import duplicate of a photo already in the catalogThis is when you are importing new photos and LrC hides (or dims) the image in the import dialog unless you uncheck the “Do not import suspected duplicates” checkbox. In this case don’t do the import. Instead in LrC look for that image using its file name or capture date/time. If the one already in LrC is marked as missing, again don’t re-import it. Rather move/copy the image using Finder/Explorer to the folder shown in LrC for the missing photo. Once you do the copy, it will no longer be shown as ‘missing’ and you can then drag it to the desired folder using the LrC Folders panel. LrC shows some images as being on a backup driveThis is the case where some images are in a folder which is on a backup drive or in a folder identified as a backup folder. There are many ways this can occur but the goal is to have LrC point to images on your normal images drive or folder. LrC should not be aware of images on backup drives or in backup folders. In general, using the LrC Folders panel, drag the folders for those images from the backup drive or folder to their proper location. You may need to see other sections of this document to deal with duplicate, misnamed, or missing folders.
Keywords:
danlrblog,
Drive Letter Change (Windows),
Folders not showing in LrC Folders Panel,
Image counts are wrong in Folder Panel,
Images must be imported into LrC first,
Lightroom,
lightroom classic,
Lightroom vs. Lightroom Classic,
Location of LrC Catalog,
LrC,
LrC Auto-Sync,
LrC BackUps,
LrC does not contain my images,
LrC Don't Re-import,
LrC Filters,
LrC Folders and Collections,
LrC Scope of changes,
LrC Screen modes,
New users,
Understanding the LrC Catalog
Comments
No comments posted.
Loading...
|