LR021 - Image Size, Aspect Ratio, Resolution, and Files for PrintingLrC Blog 021 – Image Size, Aspect Ratio, Resolution, Pixels and creating Files for PrintingV01 – June 2024 V02 – May 2026 (added RAW file section) There is a great deal of confusion and misinformation related to digital image size metrics. Terms like resolution, pixel count, DPI, PPI and aspect ration are many times misunderstood. And how this all plays into creating files for printing can get very confusing. In this article, I explain the meaning of these various term and how to use LrC Export and Print Module to produce files for printing, websites, gallery shows, and competitions.
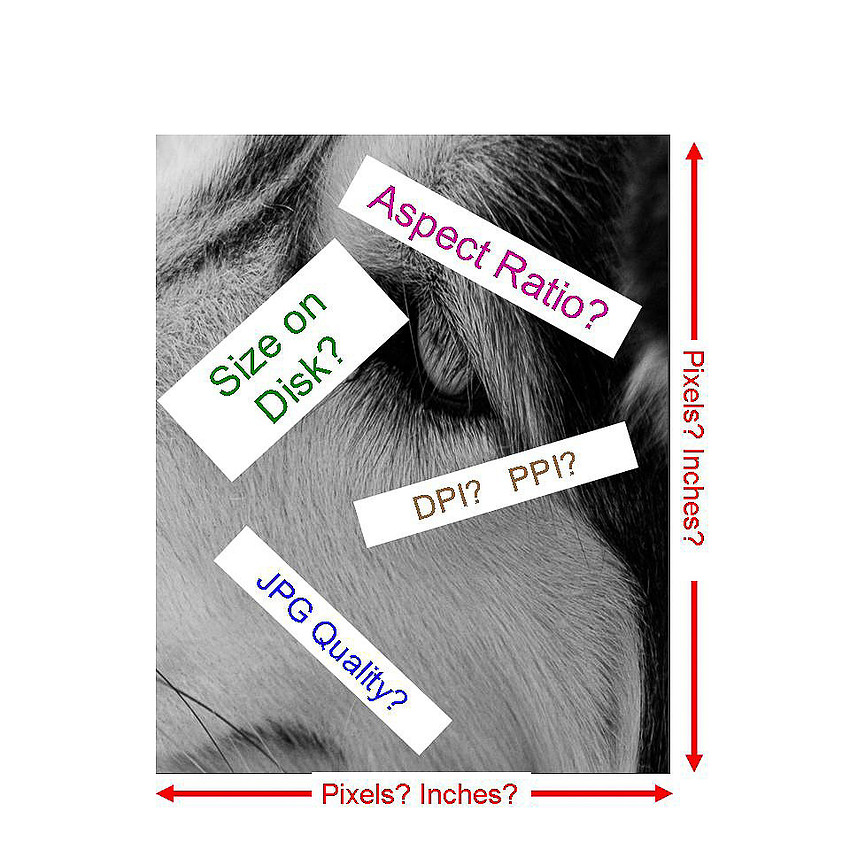
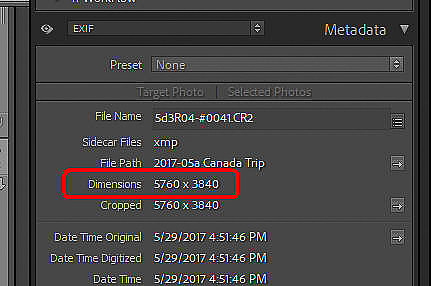
There is a great deal of confusion and misinformation related to digital image size metrics, resolution meaning and how this all plays into creating image files for printing. In this article, I explain the meaning of the various values related to image size, aspect ratio, resolution and also how to use LrC Export and Print Modules to produce files for printing, websites, gallery shows, and competitions. Pixels and ResolutionFor those new to this whole thing, a “pixel” is a dot of color in an image file. One pixel represents one, and only one, color. The more pixels your image has, the more detail can be represented and as such would have a higher resolution. For example, if I have a photo of something that has, say 100x100 pixels. That means that the scene is divided into a 100x100 grid where each cell in the grid can only be a single color. Now, let’s take that exact same scene and photograph it at 200x200 pixels. What had been 1 cell in the 100x100 version containing 1 color per cell, is now 4 cells in the 200x200 version where each cell could contain different color. In other words, you can have 4 times the amount of detail. If you’re photographing a clear blue sky this is not relevant as all 4 of those cells would be the same anyway. However if you’re photographing something with fine details, like sand on a beach, you may now be able to see individual grains of sand in the higher resolution version where you would not in the lower resolution version. Pixel DimensionsThe first and by far the most important values in relation to digital image files is the pixel dimensions. These are two values that show the number of pixels in the horizontal and the vertical direction. So, in my prior example, the 200x200 image has 4 times the number of pixels over the 100x100 image so has 4 times the resolution. Everything else is either just a convenience or a vague value that could be used as a rough representation for comparing the quality of a set of similar images. Camera manufacturers describe how many pixels files from their sensor can produce using “Mega-Pixels” (Mpx). “Mega” means “million” and is usually rounded to the nearest integer (but sometimes with one decimal value). So, a camera that produces 4,000 x 5,000 pixel images is a 20 Mpx camera. The actual number of pixels in images though is usually a bit less as pixels on the edges of the sensor are usually not used in the final image. On the sensor, these are actually "Photo Receptors", or "Light Wells" - but we'll just call them Pixels there too. In LrC, you can see both the un-cropped and the cropped pixel dimensions in the “Exif” section of Metadata Panel
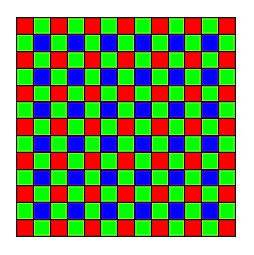
As shown above my Canon 5D Mark III is said to be a 22.3 mpx camera which produces images of 5760x3840 pixels (22,118,400 total pixels). Raw Conversion to PixelsRAW files do not contain pixels. They contain electronic values from the photo receptors in the camera. In order to be able to see such an image on a screen it first must be “rendered” which is a fancy word meaning “converted to pixels”. This is also known as “demosaicing”. A photo receptor on a camera sensor (mistakenly called a pixel) is much like a photo-voltaic cell in a roof top solar panel. It converts the energy from light into an electric voltage. The brighter the light, the more energy it carries and the resulting electrical power coming out of the photo receptor is higher. What it can’t detect is the color of the light, only its brightness. So, in order to get a color image they put either a red, blue or green color filter in front of each photo receptor so that only the light (energy) of that color hits the receptor and is measured. These red, blue and green filters are arranged over the photo receptors in a pattern. Although there are others, the most common pattern is what is called a “Bayer” pattern. In this model odd numbered rows the filters alternate between red and green and even rows alternate between green and blue (or vice versa) like this.
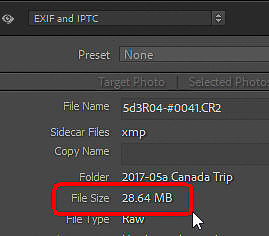
What the Rendering or De-mosaicing does is look at each receptor position along with its neighbors to calculate the color of that pixel. For example, a receptor with a green filter over it provides an exact measurement of the green component at that spot on the sensor. The red and blue components for this pixel are obtained from the neighbors. For a green pixel, two red neighbors can be interpolated to yield the red value, also two blue pixels can be interpolated to yield the blue value. The result (in the RGB color space) is a pixel with 3 values called color channels. One for red, one for green, one for blue. So how does this influence things like the advertised megapixels (Mpx) of a camera or the resulting number of pixels in the final image? The Mpx for cameras is the count of the photo receptors on the sensor chip usually rounded down to the next lower 0.1 million. They tend to round down because the values near the edges of the sensors are not that accurate and the camera tends to discard them. So, in rough terms a 40mpx camera has a bit more than 40 million photo receptors. After rendering the resulting image has the same number of pixels as there were photo receptors (after discarding those edge ones). File Size on DiskThis is a value that is many times inaccurately used to assess image quality. It is the number of bytes that the image file occupies on disk. For images this is usually represented in Kb (K=1,000) or Mb (M=1,000,000). The file size can be seen in Windows File Explorer or Mac Finder and can also be seen in the Metadata panel (when “EXIF and IPTC” is chosen)
A typical, uncompressed RAW file from my 5dK3 camera is roughly 29.3 Mb as shown below.
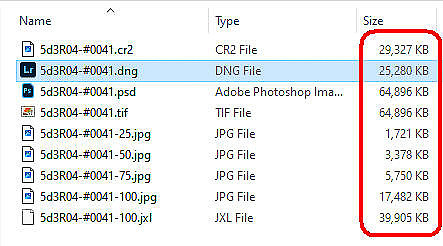
Here is why this is for the most part a non-meaningful number for evaluating resolution or quality. How much space an image file consumes on disk is vastly dependent on the file type and the amount of compression used on the file. Here is that same image in several different formats (the Jpg’s have different “quality” settings). As you can see the original 29.3 Mb RAW file grew to 64.8 when converted to PSD or TIFF and down to 1.7 when saved as a Jpg with a quality of 25. In all cases the image files all contain the same number of pixels
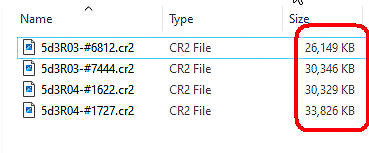
But even with the same file type and same compression, the amount of detail in the photographed scene also affects file size. Below are 4 images from the same camera with the same file type and same settings. The variation in file sizes is due to some images being a more complex (detailed) scene than others.
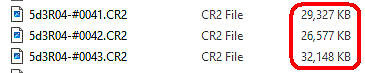
And, another little known fact is that brighter images are larger than dimmer images. Below are 3 bracketed shots of the same scene where 0041 is the middle, 0042 is the under exposed, and 0043 is the over exposed
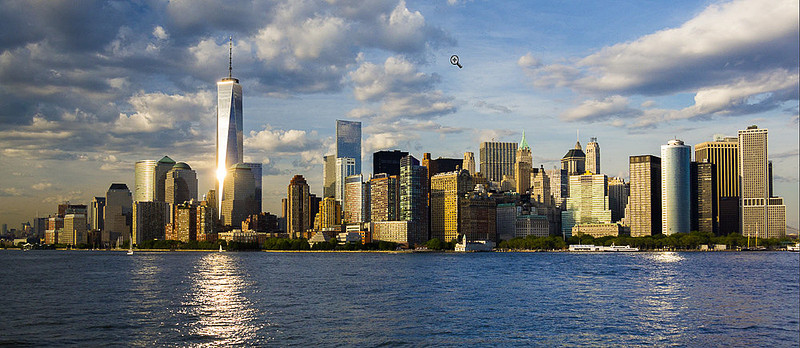
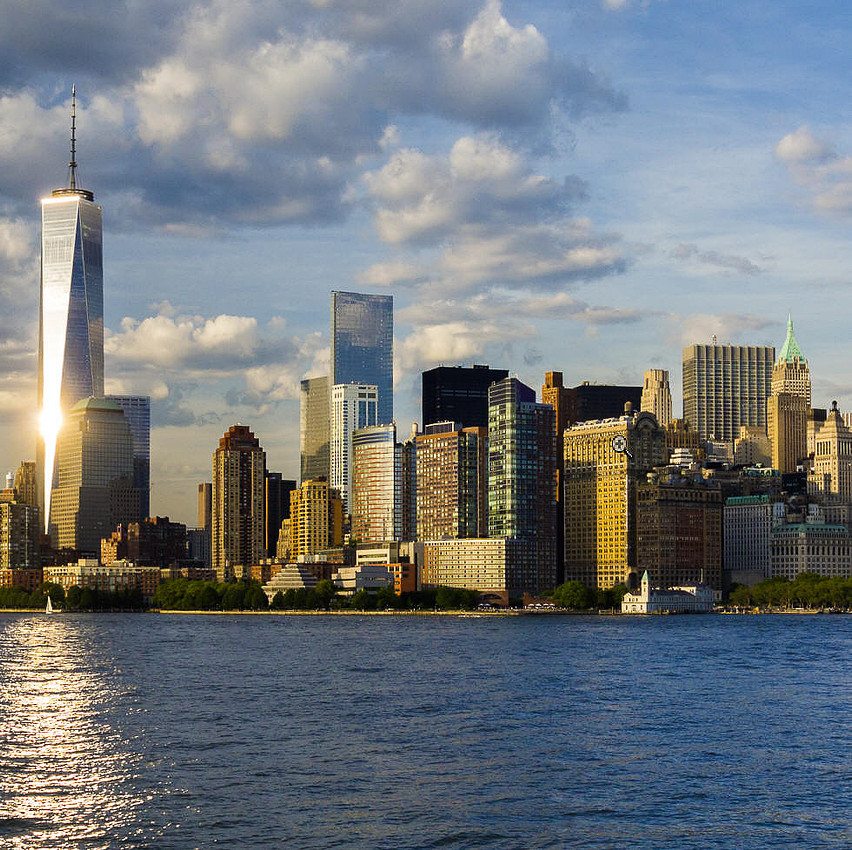
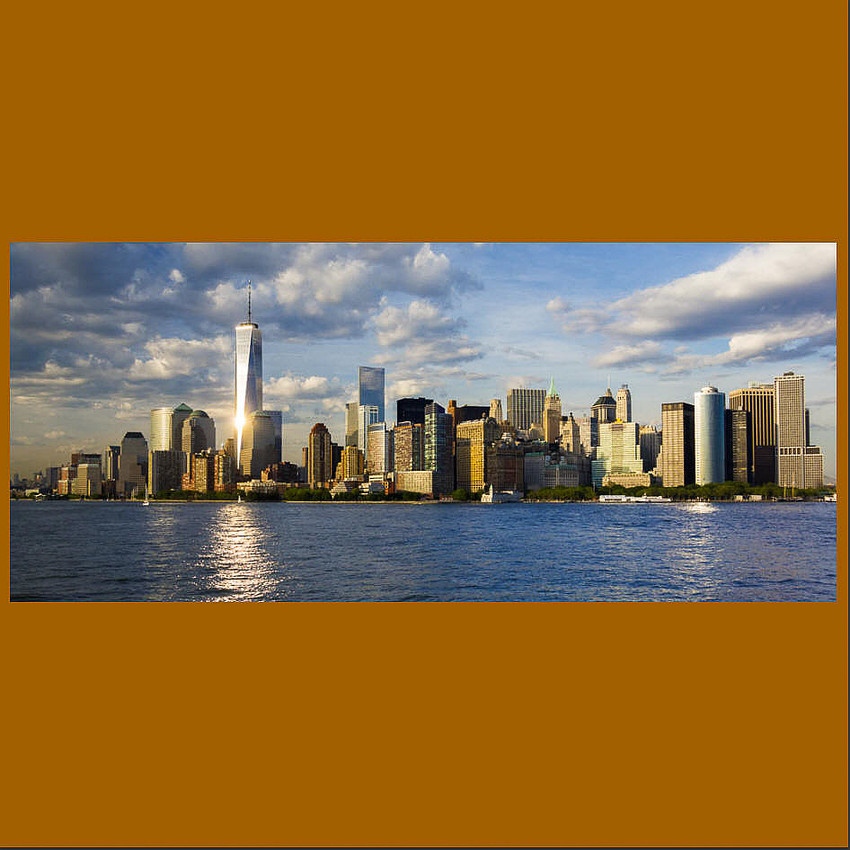
The bottom line here is that File Size on Disk is not at all useful in determining the resolution or quality of an image. About the only thing it is good for is seeing how much space on disk the file is occupying. Resolution, DPI and PPINow we get into another murky area. First, let’s define some terms. I should note that even though DPI and PPI are different, in general use the terms are many times used interchangeably. PPI stands for Pixels per Inch. This relates to display screens. Your display screen has a specific number of pixels it can display. For example HD monitors are 1080(h) and 1920(w). But that is just the number of pixels available on the physical screen. Another factor is how big (in inches) that screen is. Let’s say the HD screen in question 26.6 inches wide. That means the resolution is 72 PPI (1920/26.6). But if the screen were only 10” wide, the resolution would be 192 PPI (1920/10). In both cases you still have the same number of individual dots of color meaning that the true resolution is the same, but in the later case those pixels are each smaller and closer together. DPI stands for Dots per Inch. This relates to printed images. Each printer has a specific number of dots it can print across the page, usually in the 300 range for consumer printers. When the width of the printing area is taken into consideration this then determines the size of each dot. But, just like displays that is just the number of dots it can print across the page. When that number of dots is divided by the width of the print area it is referred to as the “resolution of the printer” and is usually measured in DPI (DPC for centimeters in metric countries). The other factor is how big the paper is you are printing on. If you put in a piece of paper that is only half the width of the printer, then it can only print half as many dots on that piece of paper. In other words the DPI does not change with paper size. Resolution is the murkiest of all as it means so many things to so many different people. For an image file the only true measure is how many pixels in each direction are contained in the file. But when talking about screens and printers, the PPI and DPI are considered the measures of the resolution. Let’s take an example. If I have an image file that is 600 x 600 pixels and in LrC, when zoomed into 100%, I can see a certain amount of detail. I then print that image on a 2” x 2” paper on a 300 DPI printer. If my eyes are good enough I can still see each and every pixel from the file and the same amount of detail is in the print as was in the file itself. However if I printed that same image on a 300 DPI printer that was 60” wide each image file pixel would need to occupy a tenth of an inch giving me 10 DPI and the image would look very pixilated even though all the image pixels were used. In reality that doesn’t generally happen as the print driver would realize that it has 300 dots per inch available but is only being given 10 pixels per inch and rather than printing the same color 30 times in a row it would extrapolate from surrounding pixels to form “made up colors” which is still not great but not as bad as the repeating option. Aspect RatioThe aspect ratio is the ratio of 2 adjoining sides of the image. For example a print that is 3” x 4” has an aspect ratio of 3:4. But, a print that is 6x8 or 9x12 also has the same 3:4 aspect ratio. Aspect ratio has nothing to do with inches – it is only the ratio of one side compared to an adjoining side. So, let’s start with the aspect ratio problem in printing. In LrC, your (cropped) image has a certain aspect ratio. For example, let’s say the (cropped) image is 3000x4000 pixels, which is an aspect ratio of 3:4. This can easily be printed as a 3x4 or 6x8 or 9x12 print as those print sizes also have a 3:4 aspect ratio. The problem arises when we need a print that has a different aspect ratio than our image. Let’s say you have panorama image that is wide but not too tall.
I know this is an extreme example, but if you try to print it on a square piece of paper you have a problem. There are really only two solutions (other than changing the paper size to match the aspect ratio of the image file).
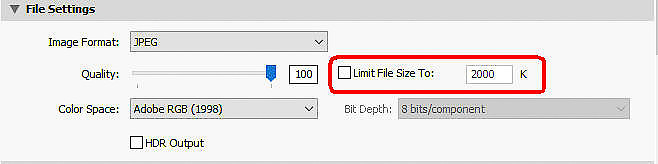
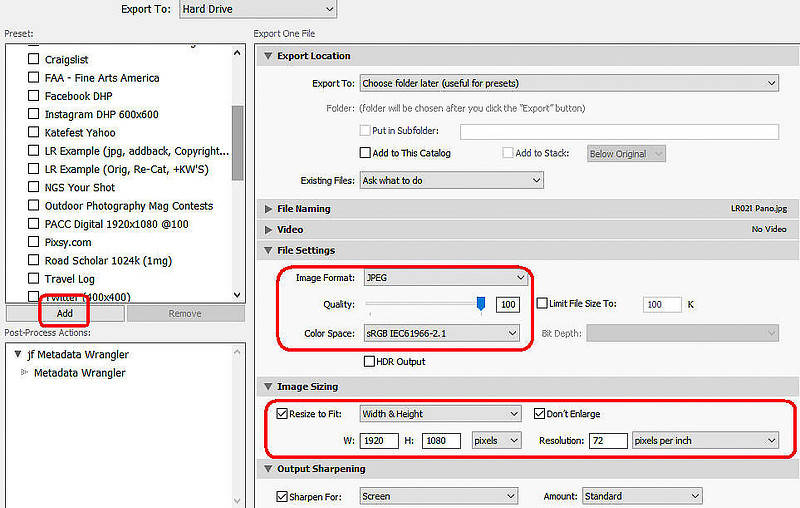
Using LrC to create files for printingWhen we want to have an image printed (other than on a locally attached printer) we need to create a file (usually Jpg) which will be what is printed. Sometimes we need to send this file out to be printed by some 3rd party like a print lab or a gallery. In some of these cases we need our print to fit into a pre-defined mat or frame. When dealing with these cases many times the print lab or gallery will indicate the specifications for the output file. Sometimes this includes a maximum file size, and/or a maximum number of pixels on the long edge. Although it is useless, for some reason galleries and competitions also tend to specify a “resolution”. To create such a file we use the Export dialog in LrC (see letter boxing below for exception). In the export dialog there are two panels where these parameters are specified. The first is the “File Settings” panel. Here you specify the export file type, JPG compression (quality slider) and the color space – none of which relate to this discussion. However, if you are required to keep the size of the file on disk under a certain size you need to check the “Limit File Size To:” check box. Then type in the limit size. This number is shown in K (Kb), so if they specified the limit in Mb just multiply their number by 1,000. For example 8Mb becomes 8000K and 3.5Mb becomes 3500K.
The next Panel is the real resolution panel which is called the “Image Sizing” panel. If you don’t check the “Resize to Fit:” box, your output file will contain the same number of pixels as does your cropped image in LrC. Once you check this box then the other fields become usable.
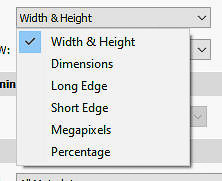
The first pull down (“Long Edge” in screen shot above) determines what you want to use to limit the number of pixels and has these options
Depending on which one you select, other fields in this section change to allow you to enter constraint values relevant to what you selected. For example, if you selected “Percentage” then you’ll get a field to enter a percent value.
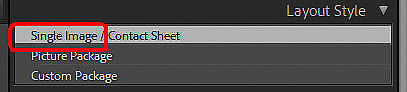
In all cases, the aspect ratio of the cropped image in LrC will be maintained in the output file even if this means that fewer pixels result in one direction than the maximum you specified or it calculated. Also in all cases, if you have “Don’t Enlarge” checked LrC will not expand the number of pixels in either direction in order to reach the maximums you specify. If you leave this unchecked then if there are not enough pixels in the image to meet your specified values, LrC will create them through mathematics based on surrounding pixels. The Resolution value and unit of measure IS ONLY USED by LrC if you specified a length measurement (inches or centimeters) in the sizing fields. LrC must know the maximum number of pixels to allow in the output file, so if you told it that you want the long edge to be 15”, then it needs to know the resolution of the output device (screen or printer) in order to calculate the number of pixels. E.g., if you specified 15” as the Long Edge and a Resolution of 300 PPI, LrC will calculate that the Long Edge can be up to 4,500 pixels. If you specified anything other than a length in the sizing the values you put in the Resolution fields are just included in the output file’s metadata in case some other program later on cares to see what you selected. Creating “Letter Box” outputLet me start out by saying that there are some 3rd party LrC plugins that, among other things, can produce letter box output. One of these is LR/Morgify2 (https://www.photographers-toolbox.com/products/lrmogrify2.php) which can do all sorts of other things as well. However, LrC can also produce Letter Box jpg files using the Print Module. It should be noted though that when using the Print Module to output a JPG, you may have to do some math by hand instead of LrC doing it. But you can pretty much get the same amount of control as you have in the Export Dialog, its just a bit more complex to get there. Here are the major panels needed for a letterbox output file (in the order I set them) Layout Style. The only thing here is to select Single Image. This will give you one JPG file per selected image.
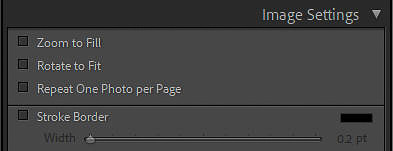
Image Settings. Nothing here unless you want some colored borders around the image. You may want to select “Rotate to Fit” if you have some vertical and some horizontal images. Zoom to fill will crop the image thus defeating the purpose of letter boxing.
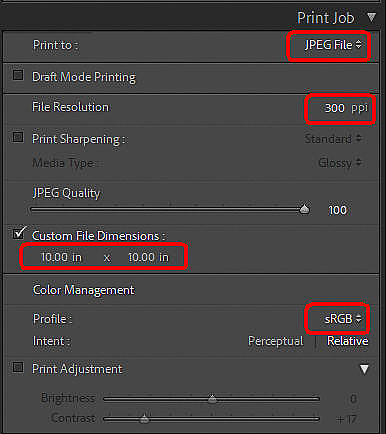
Print Job. Now we jump down to the bottom panel. Here you set the output to “JPEG File” and set your File Resolution. The file resolution is important in this case. Then in the Custom File dimensions section put in a number of inches wide and high for the jpg file. What you’ll get are these numbers multiplied by the File Resolution. In the screen shot below, my output file will be 3000x3000 pixels (10 inches x 300 PPI). If you’re after a certain number of pixels, then you have come up with a custom dimension that when multiplied by the PPI gives you the number of pixels you are after. Further down select your Color Profile.
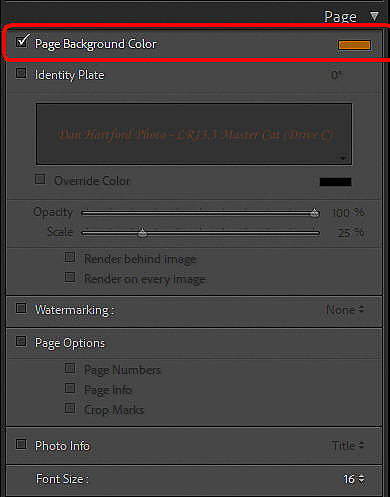
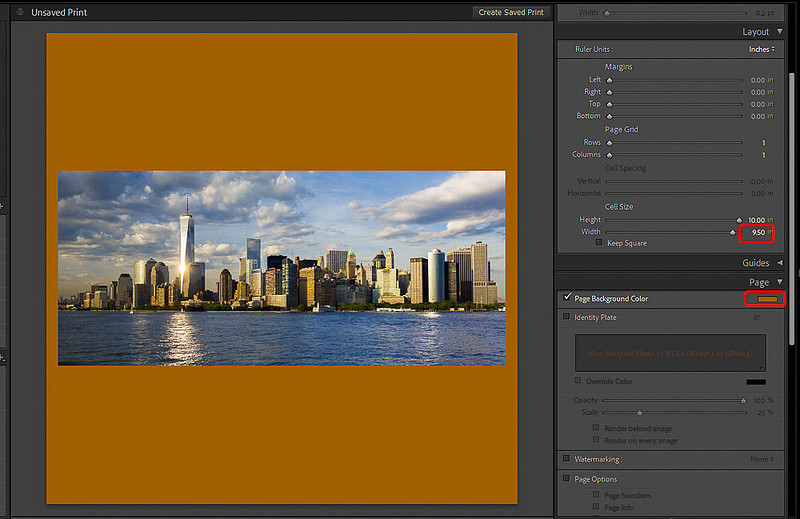
Page. Moving up from there, If you want a color canvas behind the image rather than white, check the box as shown below and pick a color with the color box. This panel can also be used to add an Identity plate, water marks, titles, captions and the like.
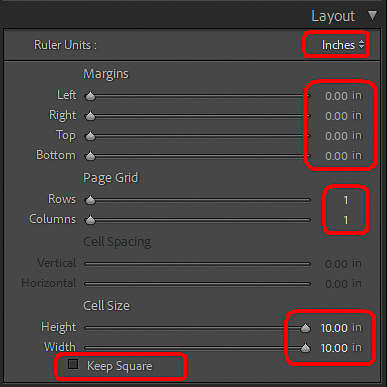
Layout. Moving up again, this panel has lots of values but what you want is for all the margins to be zero, Rows and Columns to each be 1, and the cell sizes to be at their maximum. The maximum will be the same number of inches you specified in the Print Job Panel.
The cell size section relates to the image itself so if you don’t want the image to consume the entire width or height, back off on one of the sliders in the “Cell Size” section. In the example below I left ¼” on the left and right sides
Now click the “Print to File” button at the bottom of the right Panel group. Saving your settings as a presetMany of us tend to post images on the same websites or have them printed at the same print labs or submit them to the same competitions or galleries over and over. If that is your case you should save the settings for each of these uses as a preset. A preset is nothing more than a saved set of values you’ve entered into LrC. In this case it would be the values you used in either the Export Dialog or the Print Module for a specific purpose. For example, let’s say your camera club requires that images be no larger then 1920x1080 pixels and must be a JPG in the sRGB color space. Once you input those requirements into the Export Dialog, click the “Add” button at the bottom of the left panel in the Export dialog and then give it a name.
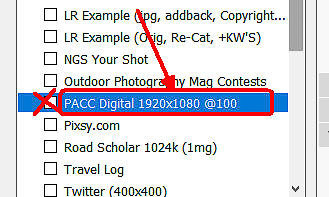
From then on, to use it, just click on it in the list. DO NOT check the box – rather highlight the name. This will fill in all the info on the right side from what was saved in the preset. At this point you can just use it as is or change any values you wish then export.
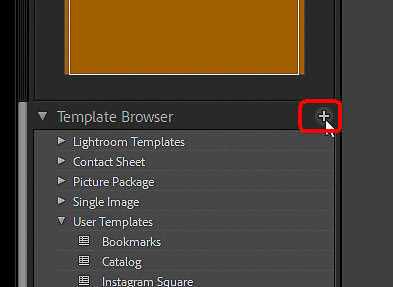
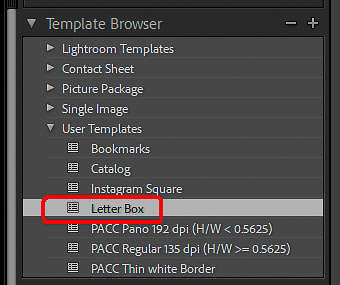
In the Print module, after setting all the parameters in the right panel group as desired, click the “+” on the “Template Browser” panel name in the left panel group. Then give it a name
To use such a template, just click on it’s name which will set all the parameters in the right panel group at which point you can change any you wish prior to clicking the print button.
Final CommentYou’ve made it to the end of this detailed article. I hope you found it informative and useful and that it addressed whatever it was that led you here. If you’ve stumbled upon any errors, omissions, or things that could be presented better, please let me know by leaving a comment. You may have noticed as you read through this article that you were not required to logon or to create an account. I did not ask for a credit card number. You did not have to provide an email address or phone number. You were not bombarded with pop up ads. I did not lure you part way into the article and then tell you to pay for a subscription to get the rest. Nobody paid me to write this article. I have no sponsors. I have no advertisers. I spend many hours (days. weeks or months) researching, testing, and writing articles such as this one to help folks such as yourself and to attract people to my web site where they may be inclined to utilize my one-on-one Lightroom Classic Training or Lighroom Help consulting services. So, I am going to ask you for a favor. Please spend a few minutes and leave a thoughtful comment. That’s it! If you feel especially motivated also post a review on Google and/or Yelp for “Dan Hartford Photo”. Free to you, very helpful to me. To leave a comment without having to register, send it to me via the "Contact+About" menu and I'll post it for you (include the blog number or name).
Keywords:
aspect ratio,
danlrblog,
dots per inch,
DPI,
Image size,
Image size on disk,
Jpg file for printing,
Jpg files for posting,
lightroom,
lightroom classic,
Lrc,
Pixels per inch,
PPI,
Resolution
Comments
No comments posted.
Loading...
|